Golden Pineapple Scarf for Cricut Design Space Star™
Disclosure: I am a member of the Cricut Blogger Network. I may receive prizes in exchange for my winning projects. Even though I am not being directly compensated for these posts, I am under consideration for a prize with Cricut Design Space Star. All opinions are 100% my own.
Sometimes I like to push the limits. When I received my Cricut Explore machine for the Cricut Design Space Star, I wanted to see just what this wonder could do. What materials can I use? How big can I go? How intricate?
How small?
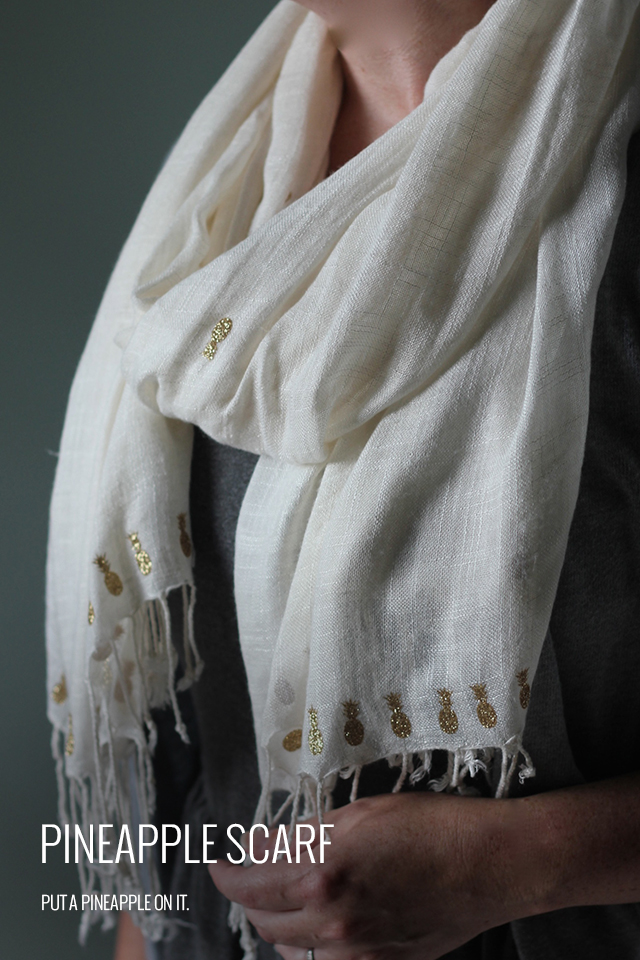
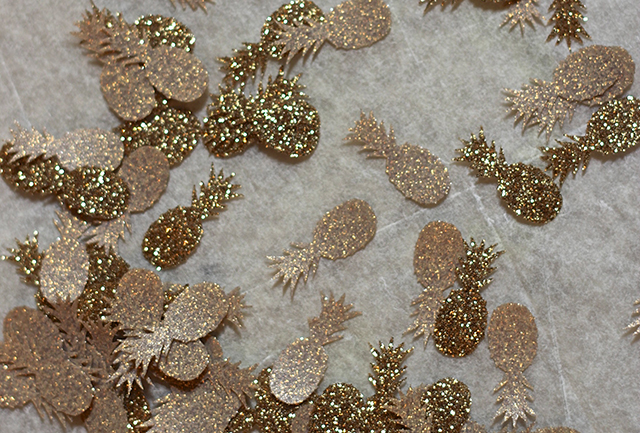
I designed tiny pineapples - like half an inch small - and watched as the Explore trimmed out every little fiber and leaf at the top of the fruit. Pretty amazing. Along with my talented and Lucky #13 team, I wanted to create something with gold. Enter the glitzy glamour of Cricut gold glitter iron on material.
Pineapples are on trend, and when you keep them ultra small, they can accent any outfit really well.
To make yours, gather:
- Neutral scarf (I loved the juxtaposition of the soft gauze with the bold glitter)
- Gold iron on material
- Cricut Explore
- Iron/ironing board
- Parchment paper
Step One: Design your tiny pineapples. I made an .svg file in Illustrator and uploaded them to the Cricut Design space. The program makes the best use of space for you! Switch the materials setting to Iron On, feed in your mat with the material in place, and watch the magic happen.
The precision of this task is pretty amazing.
Step Two: Remove the iron on material from the mat. This process is known as weeding. You may want to use a Cricut tool to help you carefully remove each pineapple. I accomplished this task while watching some TV with my kids. It's really fun to see the shape, with such detail appear from the page.
Step Three: Place your pineapples on your scarf in the desired pattern with the glitter side up. I did a line of fruit at each end and then a wide pattern for the rest of the scarf.
Step Four: With your iron on the non-steam setting, place a piece of parchment paper over 3-5 pineapples at a time. The iron on paper in the Cricut line adheres really quickly so you only need to move your iron back and forth over the parchment for 8-10 seconds.
Step Five: Remove the parchment and continue ironing the remaining pineapples.
I love the flash and subtlety of the finished scarf. And I'm already planning my fall wardrobe around it.
Why not put a pineapple on it? xoxo, MJ

My team, Lucky #13, has put together a wide variety of incredible projects. And you need to check out every single one! Find the links below. Vote for and pin your favorite projects!
You can also search for our projects on this and upcoming challenges with #cricutdesignteam13
Lucky 13 team in the Cricut Design Space Star™ team:
- Booties, Earrings, and Hearts from Andrea of Andrea’s Notebook
- Children's shirt and gold sandals from Celina of Petit A Petit and Family
- Cut out leather purse with cross lining from Erin & Tricia of Suburban Bitches
- Leather cuff from Monica of East Coast Creative
- Easy DIY hashtag t-shirts from Sarah and Jessica of Pretty Providence
- DIY umbrella and Pineapple Scarf from MJ of Pars Caeli
- Leopard leggings and tank from Sadie Jane of Simply Sadie Jane
- Laptop decals from Crystal of Sew Creative Blog


