Posts tagged projects
The crafted life: 12 Bloggers

We are making things happen today! The final four of the 12 Bloggers of Christmas (an annual tradition on Pars Caeli) didn't make it into the roll. I've saved these last ladies as ones to watch for 2015, and I'm highlighting some of their goals and new adventures for the new year. If you're not already following them, check out their sites for beautiful and inspirational posts.

PC_2015_12bloggers_rachelsmith.jpg

I'm super excited to have Rachel of The Crafted Life to start it off! I will meet her in just a few days (for reals) at Alt, and I'm so lucky that she'll be an Alt Rep with me. Rachel has great projects and roundups on her site that inspire you to get a move on and make your space more fabulous.

PC_2015_12bloggers_thecraftedlife_1.jpg
PC_2015_12bloggers_Lulu_4.jpg

For the upcoming year, I'd really like to expand my store. Right now, I sell goods on Etsy, but would love to take it a step further and host it myself in connection with my blog. Stay tuned for more!

I loved Rachel's post on her goals for this year! It's a great combo of business and personal, and I'm excited to see how the year unfolds for her. I foresee big, big goodness in her future. Also, make sure you stop over to download her awesome (free!) girlboss printables. Say what? Yes. Go check them out.

PC_2015_12bloggers_Q2.jpg

Gold-foiled Votives

This was one of those projects that I didn't really think too much about before doing, but that still came out nice (and you have to love that!). I still have them in my home and use them for votives in the fall and winter and flower vases for spring and summer.  

PC_2015_12bloggers_Q3jpg

Would love to send extra love to Carrie of Dream Green DIY. Her photography is always on point and no matter the subject, her work is consistently beautiful. I seriously can't get enough of her blog!

I ordered these fabulous photo holders from Rachel's shop, and I love how they add a dash of modern to any shelf.Keep your eye on her friends!

xoxo, MJ

The Curators of the best DIY round ups
PC_curatorsofDIY.jpg

Finding fabulous projects is not as easy as it may seem. These three curators are the ones to follow for the best DIY round ups on the worldwide web.

Before I began blogging, I had little appreciation for what we lovingly term a "round up post." These are typically a list or a collage of ideas or images found around the web based around a particular theme or topic. Searching out the best of the best is a tedious process; it's more than a Google search or Pinterest entry. It's a keen eye, a great sense of design, and a knowledge of what's possible and practical.

Rachel, Marlene, and Sarah post the best DIY round ups to be found.

You've likely seen Rachel's round ups on Pinterest. Her blog The Crafted Life is jam-packed with her process, inspiration, and business-sharing advice. Her themes are unique and her picks are always beautiful. Rachel mixes the complex with the super simple to create a lovely blend for every level of creator. Even when I'm not ready to make one of the recommended pieces, I find myself returning to her pages just to see what's inspiring her and what's trending for DIY. She always has the latest.

Marlene of Jade and Fern has a modern and clean feel to her round ups. I am always surprised by her finds and wishing to find time in my schedule to create such beauty. Though a handful of her tutorial links are outside of my comfort zone, none of them feel unapproachable or, even worse, undesirable. She has her eye set on her brand and every DIY that she selects fits well with her own posts that are in their own right gorgeous as well.

Sarah of Sarah Hearts wins for color and pattern. She finds DIYs with texture, design, and charm. Her projects are just the kinds you want to create for your best friend and yourself. The energy with which she creates her own posts comes through in her picks. My favorite part? She never picks a dud. Every project is fresh, unique and approachable for a variety of skill levels.

In today's busy times, finding great projects can be a challenge, or at least a time challenge. Follow these three curators for only the best of the best. You'll appreciate their careful editing and helpful suggestions, I promise.

Who would you add? Who always finds just the right project?

xoxo, MJ

Fresh Holiday Traditions: Party Hat Christmas Trees
PC_partyhattrees_1.jpg

"Perhaps I had a wicked childhood, perhaps I had a miserable youth, but somewhere in my youth or childhood, I must have done something good."

Whether those words are sung from Carrie Underwood or from Julie Andrews, they resonate with me here today, friends. We're coming to the near close - one more week - of another great series of projects and posts from my ladies who collaborate on the Fresh Holiday Traditions series. I feel blessed to have been asked to work alongside these minds and spirits, and I feel pretty lucky that they were willing to do it one more time!!

To recap our creations thus far:

And today, we're adding Party Hat Christmas Trees - fun for the kids table at holiday meals (or the adult table), or to set around the office or house in seasonal decor.

PC_partyhattrees.jpg

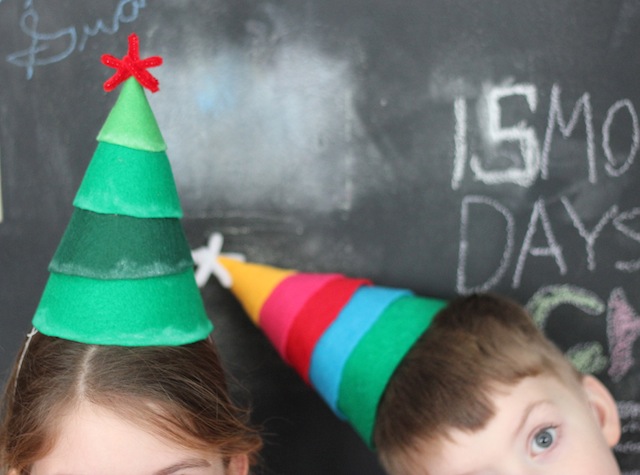
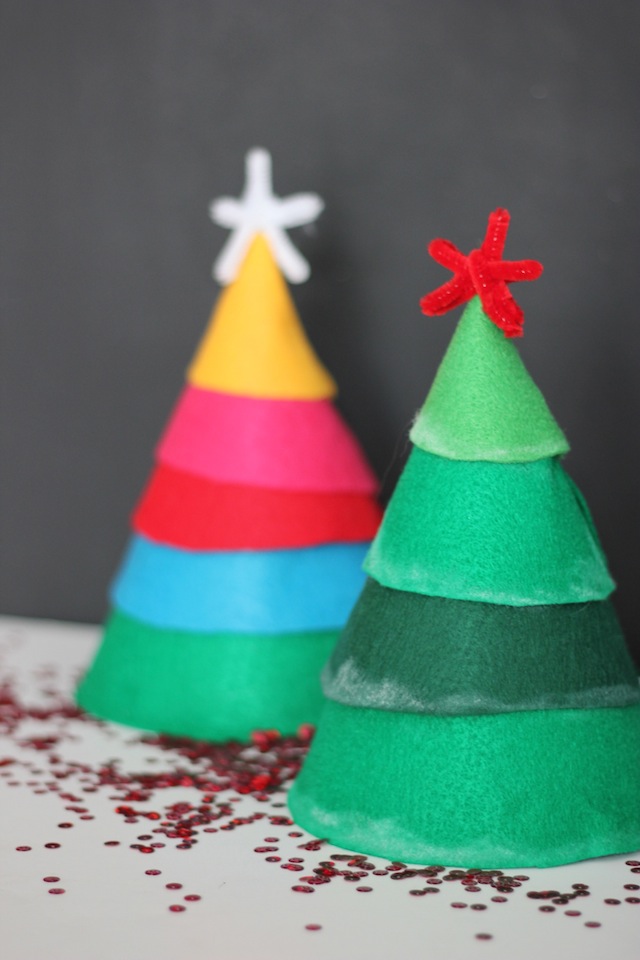
Inspired by the clever craftings of Kelly from Studio DIY, we over here at Pars Caeli decided to convert our old party hats into Christmas trees! These cute cones make a great head toppers as well as darling Christmas decor.

Imagine setting up the kids table with party hats, some felt (precut depending on the ages), some pipe cleaners, sequins, pom poms, and see what kind of hats they can create before Christmas Eve dinner!

Here are the suspects, no-longer-used princess party hats:

IMG_3165.JPG

Grab some felt (about two rectangles per tree), some craft glue or hot glue, chalk, and other crafty notions.

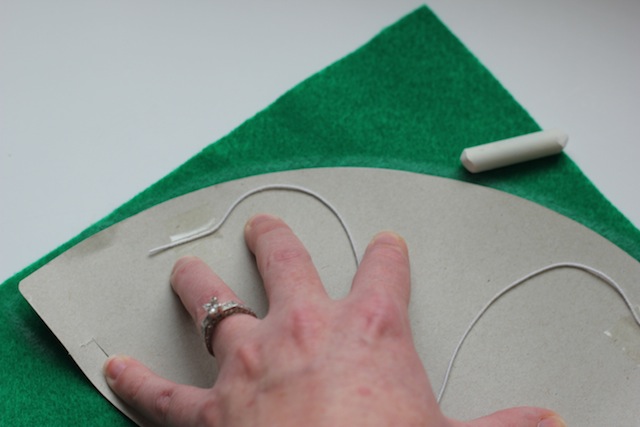
First, unfold one of your party hats to trace the size for your C-shaped ring of felt. I used chalk to trace my outline. It makes a nifty double as snow!

IMG_3172.JPG

We selected a variety of colors for a traditional and more modern tree. I'm kind of a felt softie. I can always find a reason to get a few sheets every time I swing by the craft store.

PC_partyhattrees_3.JPG
IMG_3173.JPG

Ring by ring, beginning on the bottom, glue the felt onto the hat! Varying colors adds some texture and life to your creation.

IMG_3192.JPG

You can imagine these as all white with silver and/or gold accents, too! Hello holiday photo booth!

IMG_3181.jpg
IMG_3186.jpg

Little elves find them quite funny.

Imagine whole forests!! Or entire family photos with everyone in tree-d hats!!

Enjoy these and don't forget to share if you make 'em! Thanks gals for the fun. :)

xoxo, MJ

Endless Summer Projects: Friendship Charm Bracelets
This Endless Summer Projects post is sponsored by OgoSport. Tell OgoSport your favorite playground, park or outdoor space to play and your favorite place to refuel with a bite to eat using hashtag #playrefuel or by visiting them on Facebook and you'll be entered to win a $250 OgoSport gift basket and other prizes. Contest ends August 31st. Unrelated to sponsorship (and uncompensated), we love our Ogo stuff. If you're looking for a fun summer birthday present, pick up some Ogodisks for the great kids in your life.
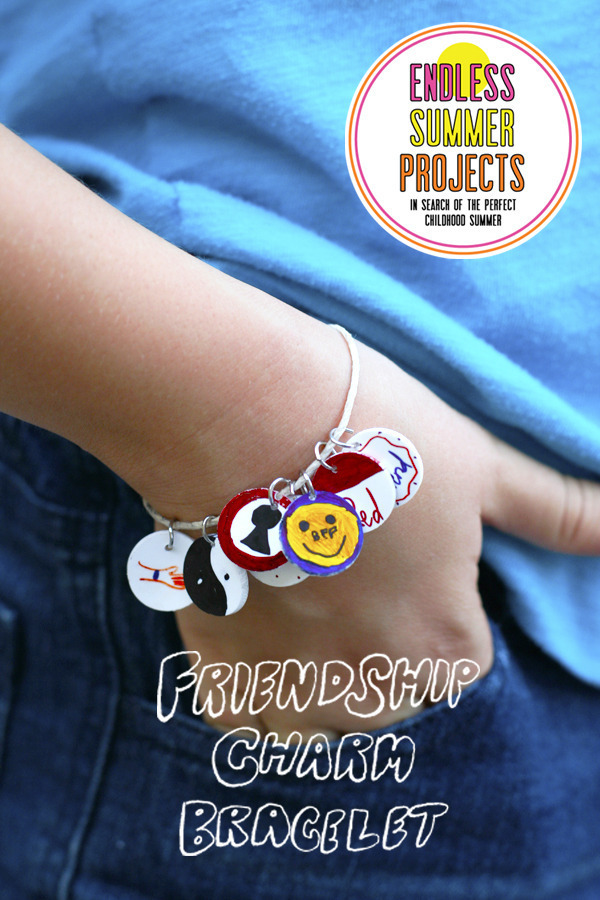
Jen over at Classic Play has this week's project, these adorable friendship charm bracelets! These creations turned out so cute. I love all the details that she's added. My oldest has been making anklets and bracelets for her friends and her sister this summer so these are right up our alley. Head over to Classic Play to check it out!
Here's a recap of all the fun of Endless Summer Projects:
Join us next week for a fabulous new project from Melissa over at Lulu the Baker!
xoxo, MJ
Endless Summer Projects for big and little kids

Welcome to Wednesday, friends! We, Americans, have a dynamic holiday coming up tomorrow, and my family is looking forward to heaping helpings of berry trifle, hotdogs/hamburgers, and bowls of watermelon.

But before we bust out into full-out holiday fun, I have some great projects for you!

First up, a drawing challenge for anyone who's game. put out the offer to join her in the #30daysketchbookchallenge. That's right, every day for the next 30 days, the task is to sketch, photograph, and post with that hashtag. Simple, right?

At first I was all about cheerleading for these brave ladies like Kim of Design Life Kids. What guts do these women possess to share their doodles with the world, heh? And then it was me sitting with a legal pad and a great ink pen, scribbling away, and snapping a few shots. I am such a sucker for a good challenge. So, here I am, putting my brave on (no judging please), and I'll be sharing my sketches along with a growing community of others.

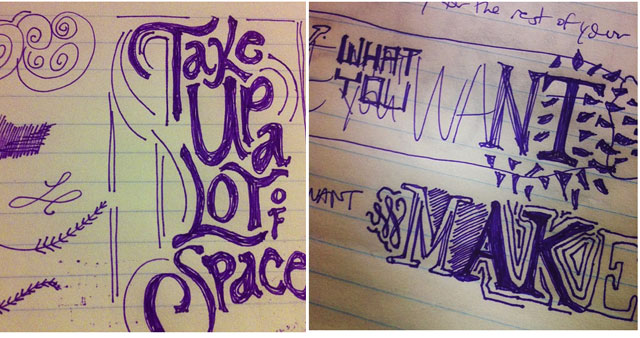
We are only on day 3 so there's still plenty of time to come along! The two shots above are my #1 and #2 sketches. I'm working on my prizes for AltNYC friends which will incorporate some of the best quotes from the conference along with some handlettering to make a great piece of New York that we can all keep alive!!

Following the brilliant lead of Elizabeth from the Note Passer, I've begun a Sketching Thoughts Pinterest board that you're welcome to follow for some drafting ideas.

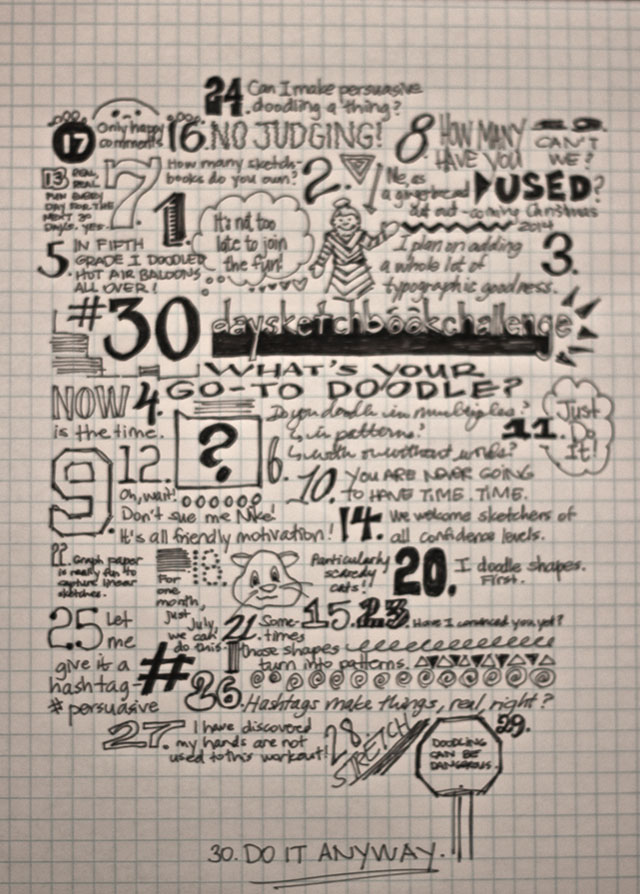
What you see here below is what I'm calling: Persuasive Doodling. Yes, I just made it up. Here is my 30-reason manifesto as to why you should join the 30 Day Sketchbook Challenge.

Sorry for the lack of order. This is how my brain works.

Incorporating such nagging questions as - What is your go-to doodle? You know, the one you find yourself making when you're terribly bored in a meeting or stuck in a waiting room.

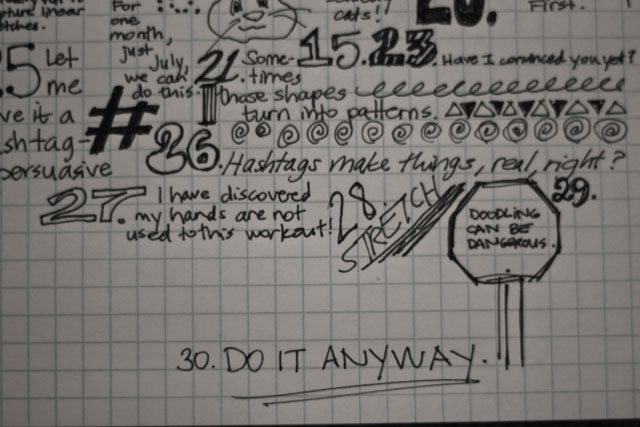
And great reassurances like, "Hashtags make things real, right?"

Check out #30daysketchbookchallenge to see all the sketches coming at you daily.

(And go ahead and add yours while you're there.)

And for the children in your life, the bubbly Alexandra has this week's Endless Summer Project with Bubble Painting! Bubbles are still great fun for all three of my kiddos, even at 8, 6, and 3. Swapping turns from bubble makers to bubble poppers, and chasing wherever the wind might blow.

And now Alexandra has a way for kids to create that pop of color with some fun outdoor art. This would make a fabulous addition to your family fun for the 4th.

Thank you so much, Alexandra!! I so love being a part of these projects every Wednesday, and I can't wait to show you what I have in store for next week. :)

xoxo, MJ

Endless Summer Projects: Rings of Color Sharpie Dyed Shirts
PC_Endless_summer.jpg

It's my turn! (I am so bad at delayed gratification.)

Time to welcome you all to another wonderful Endless Summer Project from the team of hyper-cool moms: Melissa, Alexandra, Jen, and me If you stepped into the vast wormhole of the internet last week and missed Alexandra's hopping backyard BBQ, you missed a safe alternative to horseshoes, a great grilling recipe, and an adult beverage to adore. Skip on over and enjoy... and then come right back. Or maybe go check out Melissa's cute mosaic stepping stones first. And THEN return, bright-eyed and bushy-talled to check out our Rings of Color Sharpie Dyed Shirts!!

PC_endlesssummer_sharpieshirts.jpg

Last summer we did a great tie dye shirt project together, and my children loved crafting and wearing their shirts. To kick off our summer together, I wanted to make another wearable piece, and what could be better than an excuse to use Sharpie markers?

This project is totally inspired by the great Martha Stewart (I'm hoping we'll be BFFs after next week). To see a helpful video on how to, go here.

Here's what you need:

  • Light-colored shirts
  • Sharpie markers - be sure to avoid contrasting colors unless you want brown hues
  • Isopropyl alcohol
  • Eye dropper
  • Circular surface
  • Rubber bands
  • Cookie sheets

We took our project to the backyard for more summertime fun, but this craft is safe enough to do in a clear spot inside for a foolproof rainy day creation, too!

PC_endlesssummer_sharpiedyedshirts.jpg

Neon is all over the place this summer so we chose new NEON Sharpies. Their saturation was a great choice for the brilliance in color palette.

Step One: Insert a clean cookie sheet into the t-shirt. This will prevent the alcohol and markers from bleeding through to the back of the shirt.

PC_endlesssummer_sharpiedyedshirts_1.jpg

Step Two: Visualize your design (or not). My girls and I decided we wanted to created a strip of colors that ran down just one side of the shirt so we planned out where we wanted the circular shapes to go. If you're more into free form, you can set up one circle at a time and add as your fancy desires.

Step Three: Insert the circle object underneath the top layer of the shirt. Secure its placement with a rubber band.

PC_endlesssummer_sharpiedyedshirts_2.jpg

Step Four: Draw thicker dots with Sharpies in a ring pattern.

PC_endlesssummer_sharpiedyedshirts_3.jpg

Step Five: The fun!! Fill an eye dropper with isopropyl alcohol. Squeeze out one drop at a time and watch the colors slowly bleed. Try different effect for dropping it inside the circle where no color is and dropping it right onto the dots themselves. To keep your colors more brilliant, limit your drops of alcohol. To spread your circles the most, keep adding drops.

PC_endlesssummer_sharpiedyedshirts_4.jpg
PC_endlesssummer_sharpiedyedshirts_5.jpg

Step Six: If you don't want the rings to bleed into one another, be sure to wait until the alcohol has mostly dried before moving on OR spread out the rings so that they do not overlap.

PC_endlesssummer_sharpiedyedshirts_7.jpg

Step Seven: Allow the alcohol to dry (mostly) and flip to the other side to create more patterns and fun! Once the alcohol has dried completely on both sides, remove from cookie sheet. Pop in the dryer for 5-10 minutes (on its own) to set colors.

Step Eight: Wear to your heart's desire! Colors should now be set within the fibers but I'd still recommend washing with like tones on the first machine wash.

PC_endlesssummer_sharpiedyedshirts_6.jpg

Fair warning here, friends: fun projects like this might ensue a whole lot of sillyness and laughter so be prepared to make great summer memories.

PC_endlesssummer_sharpieshirts.jpg

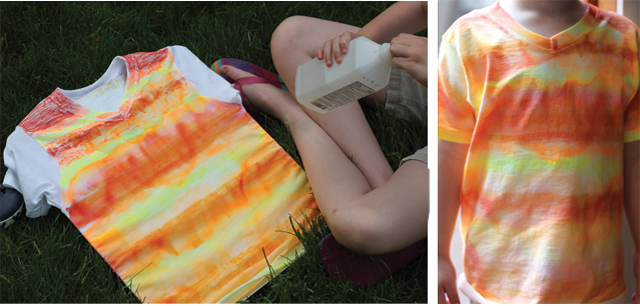
Sidenote: Sharpies bleed in the most wonderful ways so for my 3-year old son, we made a striped shirt. Try your hand at all sorts of patterns and shapes! L wore this for three days straight until I had to cut him off. :)

PC_endlesssummer_sharpiedyedshirts_9.jpg

So grab your Sharpies, friends, and get creating!! We'd love to see your creations - share them with us using the hashtag #endlesssummerprojects and look for sneak peeks of Jen's fabulous project for next week!

Here's to an endless summer of childhood fun.

xoxo, MJ

Summer Reset

Hey y'all. It's almost here. It's almost summer. Spring is the happy harbinger of summer.

And summer is extraordinary here in the Midwest. It is the time of year that color fills every view, and the warmth of the sun melts away the memories of the gray that surround us the remainder of the year. This summer I'll be hitting the reset button, finding space to bask in childhood alongside my kiddos, take some time to party, and give myself the space to create and rest. But I'll be doing it in the midst of a busy professional life (our busiest time is always the summer) so we're in this together to hold each other accountable.

Pars Caeli is following along so welcome to our new regularly scheduled time for summer blog posts! If you're following me over on Twitter, you read my easy breezy announcement to stretch weekends to four days (oh, how I wish I actually had that power). Beginning this week and continuing into the beginning of the school year, I'll post every Tuesday, Wednesday, and Thursday. Sometimes you just need a Friday away from social media and devices...and then maybe you need a Monday, off, too. :)

I'm excited to show you all I have in store for the summer edition of Pars Caeli. Fresh ideas for Mommy and Daddy School, family bookclub, a new craft/DIY series with some amazing bloggers you know, a whole lot of adventures, and even a few surprises are coming at you - bam, bam, bam!

Right now we're in the midst of dreaming up one of these. Wanna make one for yourself or your family this summer?

Celebrate the Normal photo post continues tomorrow so don't forget to add #celebratethenormal to your photos on Instagram and Twitter. Sparkles and new life coming your way...

xoxo, MJ

Vlog - DIY Make Your Own Patterned Bookmark from Children's Art

Tra la la la la, we made it! It's Friday, and I'm wrapping up a whole lot of work today. Feels so good.

My buddy, Paige (one of my major blog inspirers) is here today, readers. And she has brought an ah-mazing present! Enjoy, enjoy the first vlog we've had on this here blog...a charming DIY.

Paige is the head honcho over at Approaching Joy (you should also totally follow her on Twitter cause this girl knows how to brighten a day). Okay, let's be honest she's the only honcho, but she's one of those people who dig alone time. If you adore pretty things and slightly offbeat humor and have a propensity to enjoy small beautiful moments in life, you're probably already her friend. Go say "Hi" on her blog or Twitter (just make another tab and come on right back).

>>>>>>>>>>>>>>>>>>>>>>

Hey guys!!

As a *kid I loved going to the library.  It was a chance to learn about new people and cool places and let my imagination get even wilder. When I found out that the Pars Caeli family loved taking trips to the local library, I instantly knew about a project that would encourage both their reading and artistic skills: A "real" bookmark designed by your children (with some technical help from you) that they will be proud to use all summer.

*Confession: I'm still a proud bookworm.

Supplies:

Bookmark-supplies

Directions:

1.  Have your children use a jumbo marker to draw a simple image using the majority of the space on the  8.5 x 11 piece of printer paper, leaving a one inch border around the paper. (The marker size is important because it will give the image "weight" that is nice later on.)

2. Scan the image onto your computer and open in up into Photoshop or Photoshop Elements.

(After this step my written directions got a little... janky... so I made a screencast that you can watch where I go through every step.  Click on the link below, press play, and then hit the fullscreen button on the bottom right corner to see me in action!)

 Click on these words Bookmark DIY Screencast to watch the simple DIY!

Screencastbutton

3. Use the Paint Bucket tool and fill in the lines of the scanned image.

4. Crop the image so that the scanned edges are cut off.

5. Save this image.

6. Click the Edit button at the top of the screen and then click "define brush".

It will ask you to name and save the brush.

7. Create a new document that is 3x8.5 inches.

8. Choose the brush tool and select the brush that you just created.

9. When you first select the brush it will be the original size, but, with your child's help, decide how big the shape should be using the size tool to the right of the brush selector. Also, choose a color for the shape.

10. Use your new brush as you would any other to create a pattern or random design to create the background.

*As someone who only has six months of Photoshop experience it took me forever to realize that most brushes aren't supposed to be used as a "click and drag" motion but with a single click instead. Check out these tutorials (

here

and

here

) from

Creature Comforts

for more information on how to use brushes.

11. Use steps 1-7 to create a crush using your child's hand-written name

12. Use the rectangle tool to make a white square at the top of the bookmark.

13. Follow steps 8-10 to choose, adjust and use this second brush to fit into the white square.

14. Print out your bookmark (in color!!) on the white card stock.

15. Punch a hole at the top of your book mark.

16. Thread embroidery floss of similiar colors to your bookmark into the hole.

Ta-da!!!

A brand new personalized bookmark for your kids that will be a keepsake (with both their creativity and their handwriting) for you.

{MJ here. Looovvve it! And, as Paige's friend who's never met her in person (funny how the blogospheres work), I treasure hearing her describe it all. She's a belle from Arkansas, can you tell? So charming. Looks like we're making some bookmarks this weekend!!}

DIY: Turn your child's art into fabulous home decor

It's Thursday and usually we'd have bookclub today to talk about Happiness. Meet me back here next Thursday and we'll catch up. on what we've missed. Instead I have two great days of DIYs to round off the week, wonderful readers!! After I get done with this monster workload, I'm looking forward to creating and crafting...and I'm inspired by Claire's awesome idea!! Check out more from Claire here.

>>>>>>>>>>>>

Hi again from Ireland! Today I'd like to show you a great way to showcase the art masterpieces (that are whipped up by the tiny hands in your life) with the help of some printable fabric sheets. I'm sure that like me, you have a whole folder of lovely artwork by a variety of mini-Picassos which shouldn't be hidden away, so this project will show you how to make one into a cushion so you can display their brilliance in a practical way.

Here is the original rainbow painting by Niamh, aged 3, which I scanned into my computer.

I asked her to paint it for the room in my beach house which is decorated with rainbows such as this one, which I took at Iguassu Falls in Brazil.

Next step is to print it on to fabric (non-shiny) side of a printable sheet such as these from EQ Printables which you can get

here

. I get great results just using my normal inkjet printer.

Let it dry for about 15 minutes and then peel off the plastic backing before soaking the sheet in room-temperature water for about 10 minutes to set the picture and then gently rinse the fabric painting.

The next step is to lay it flat to dry and you can use this time to choose how you will use your new fabric masterpiece. Purses, memory quilts, appliqué onto tshirts, bags, the possibilities are endless. I decided to make a cushion, so I measured the pillow insert I had chosen and then selected a matching fabric, which is a bright rainbow coloured polkadot.

If you are very proficient with a sewing machine then now is your moment to shine with zips, buttons and bows. I decided on the simplest option which was to cut four strips of matching fabric to sew to the sides of the picture, two shorter strips at the top of the picture. I think if you use a random patterned fabric this is much easier, as you then you aren't trying to match up patterns with the four sides!

Then sew two longer strips to the sides to make a square, or as close to a square as you can get! It doesn't matter at this stage anyway, as the real square will take shape when you attach it to the backing material.

You can then sew this completed cushion front to a backing material, right sides together and finish it however you want. Zips are good, and simpler than you think; however, I used a simple foldover finish by making one side of the backing square longer and folding it over, sewing the extra piece inside the backing to hold the cushion insert.

And there you go... kid's artwork beautifully decorating your room.

Here's another which demonstrates a 4-year old's explanation for how the dinosaurs became extinct!

This would be great for a children's bedroom, or a brilliant present for a doting grandparent. You could get the mini-artist to draw a picture of them and their grandparents, or them and their Daddy for fathers' day or with their Mummy for mother's day. I've also been making kid's travel art kits recently and one of their pictures would be perfect to sew on to the front to personalise them.

Now to choose the next picture from the folder to immortalise in home décor!

Thanks for checking out my rainbow cushion.     Claire

{MJ here. Uhm, can I get a rainbow room and a beach house, too? I promise to put cute kiddo pillows all over it!)