Posts in DIY
Make It: Washi Tape Frames

Hi there, lovelies. It's wonderful to have you back here again. I missed you at the end of last week, but I promise I've been working some magic behind the scenes to move Pars Caeli to a new level of fabulous.

I had a wonderful birthday - thanks for all the wishes - that was topped off by a fantastic performance of Wicked. Though I'd heard the music and read the book, it was my first time seeing the musical, and I loved it!! Many other special, special moments continued throughout the weekend and into Mother's Day.

PC_mothersday.jpg

I have definitely grown into motherhood and grown from motherhood. Lately as they are now 3, 5, and 8, I find myself staring at my kiddos, amazed at the people they are becoming. Where did these lovely souls come from, and how did I get so lucky to share in life with them? I'm not sure, but I am most definitely humbled and grateful.

And on that note, I have an easy DIY I want to share with you. I made these cheeky notecards with vinyl letters last week that I'm stuffing in packages headed out to some of my favorite bloggers who joined in For the Love of Blogging series.

One of my favorite parts to these bundles are some sacred words.

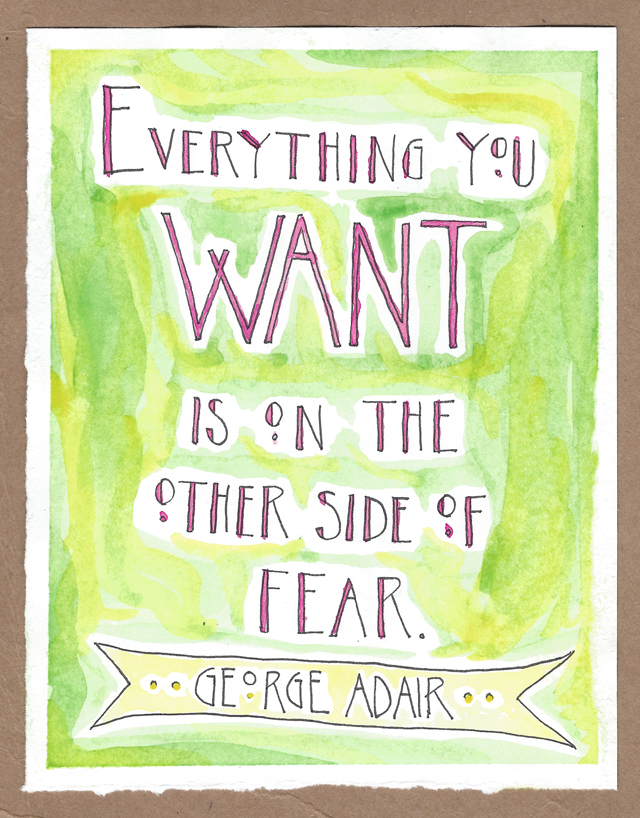
These inspirational quotes come directly from the writers themselves.

I wanted to create something special for these writers, photographers, artists, and stylists. And as any crafter knows, washi tape is the most forgiving medium around so I was able to adjust and rework the prints as I wanted.

PC_washitapeframe_.jpg

Here's what you need: cardboard, fun paper, glue, washi tape, and a bulldog clip for hanging.

I treasure the words these bloggers shared with me. And I hope they treasure their own words in the same way. Sometimes we discount our own wisdom, don't we? I think with these prints around, it will be a lot harder to do!!

PC_washtape2.jpg

STEP 1: Design your print. Load paper. Print.

STEP 2: Trim print and cardboard to the same size. These are 5x7 but make them in any size you'd like.

STEP 3: Glue paper to cardboard. I used rubber cement just because I love it.

PC_washitape_6.jpg

STEP 4: Add washi accents. Make sure that you use the washi tape around the edge to combine the cover the cardboard/paper seam.

STEP 5: Add a washi either right next to the framed edge or a bit closer into the center for more of a matted look.

STEP 6: Attach a bulldog clip for hanging!

PC_washitape_5.jpg
PC_washitape_3.jpg
IMG_1725.JPG

Have you ever framed your own words?

xoxo, MJ

P.S. A brand new Celebrate the Normal is headed your way on Wednesday; don't forget to tag your photos. And, I'll be joining in Anne's Love Yourself in a special Tuesday post tomorrow. Hint: The temptations of Photoshop.

Make It: Vinyl Letter Cards

Hiya, friends!! How are you? I'm still in a bit of a fog from an active weekend of sports, spring cleaning, and one of my very favorite places... Lake Michigan. The Lake is a fabulous source of renewal for me amidst this land-locked farmland (which I also love).

Friday night left me a few moments to craft and create, and today I'm sharing a super easy DIY with you! I picked up some vinyl letters from Michael's during a great sale - and in one of my fave fonts, Helvetica - and I thought they'd be perfect for the packages headed out to the great ladies of the For the Love of Blogging series.

PC_vinyllettercards.jpg

I kept the text simple to accentuate the fun of thick, vinyl letters.

PC_vinyl2.jpg
IMG_1826.JPG
IMG_1827.JPG
IMG_1828.JPG

Super easy, full of wit. Just my style.

I can't wait to send these on their way! .

Join me back tomorrow for a very special Tuesday post, inspired by the awesome Ann and her fabulous new series.

Let's get our game faces on for a week of big, big joy.

xoxo, MJ

P.S. A little later this week, I'll be showing you what else is in the mail for these wise women!!

Itty Bitty Lovelies: Straight from the Magazines

Hey you fabulous reader, you. How are you?? Can I tell you, the weekend around here was just gorgeous? Top to bottom, good old-fashioned fun. My youngest, L, got his first sunburn ever (oops, bad mom), and his sun kissed, rosy cheeks are just the cutest thing ever.

Back at it with some Itty Bitty Lovelies to start off the week from some reading I was able to do this weekend (reading magazines = leisurely bliss around here). And if you follow me on Instagram (go ahead, it's fun) at @parscaeli, you saw that my sweet friend, Andrea, sent Sweet Paul magazine my way, and I perused the pages over and over again.

Unforgettable centerpiece

Have 90 stems of fresh flowers sent your way? No? Me, neither. However, Sweet Paul did, and this amazing wreath centerpiece came into existence. Pop over and gawk with me. Back to reality, though... I think we could make something pretty spectacular from carnations or other inexpensive blooms in bulk quantity. The final effect is quite stunning. And, I kinda just want to wear it on my head. Is that just me?

Bold brows are the thing

I've had distinctive eyebrows since birth. Not particularly bold, but arched in a way that gives my face expression even in my most passive moments. The thick brow is on the return, and Rue has some great products and tips for making the most of our brows. Would you go bold?

Do not lose another earring

What do you do with all the spare buttons that come your way? If you're me, you put them in one of your dresser drawers until you decide you have too many and then you toss the less pretty ones. The Paper Mama through Better Homes and Gardens has created the perfect use for them. Button earring holders. Every great button has at least two holes, yes? Behold, a fabulous way to keep sets together and show off unique buttons at the same time.

Itty Bitty Lovely from me:

Pack the picnic blanket wherever you go

The weather around here is just turning the corner, and I'm so thankful that we still had our waterproof/weatherproof foldable blanket in the back. We were ready for soccer and softball games, and impromptu gazing at the clouds and sketching outside. Give yourself an adventure, and pop a blanket perfect for any terrain in the trunk. You won't regret it.

Off we go, for another great week...

xoxo, MJ


For the love of blogging: The stylist

Welcome back to this favorite series of mine, friends!! Today I'm bringing you a true talent and an incredibly put-together lady, Mrs. Erin Hiemstra of Apartment 34

Erin is a digital communications expert, fashion and décor enthusiast, and a stylist who has transformed her passions into her career. She went full-time last year to pursue her dreams of working with creative clients such as Rue Magazine, Trophy Cupcakes, Mark and Graham and Chloe Rose Boutique among others (yeah, she's that awesome).

Back in the day (AKA fall 2012), Erin was kind enough to recognize Pars Caeli as one of her Noteworthy Newbies, and I'm delighted to have the chance to have her over here with us to peek into her blogging journey.

Enjoy the images and Erin's adventure!

Apartment 34 was originally meant to chronicle the renovation of my first condo in Seattle, a renovation that has never taken place! Six years later I now live in San Francisco and the blog as blossomed into a full lifestyle site and I couldn't be happier.

Just look at my early posts. Horrible image quality, atrocious writing. My whole first year could be considered a mistake but it was my authentic voice at the time.


There are so many reasons I've kept up my blog for so long. First is getting to constantly talk about topics I love and have real passion for - styling, design, fashion, food, travel. I really do find all these things so critical to a well lived life. And then there is the amazing community of bloggers I consider myself lucky to be a part of. I've made true and long lasting friendships with people from all around the world through this crazy blogging experiment. And finally I blog for my readers. I feel an obligation to them - to deliver something fun, interesting and new everyday.

I look for inspiration absolutely everywhere - my files, bookmarks and pins go on for days. Something I hear about from a friend. Everything is a potential blog post!


I'm always drawn to someone with a beautiful well-designed aesthetic, gorgeous imagery, interesting fresh ideas and/or a compelling story. I'm a speed blog reader so there are few that get me to pause and dive in deep but I love it when they do.

I wouldn't even know what to do with myself. My brain is now so trained to always be scouting for the blog. I would have more time to read novels, watch movies and sleep though. 


I turned Apartment 34 into to my full time job last year, but the blog is only one component of my business.

I use my first career in PR & marketing to offer influencer marketing consulting services to lifestyle brands. In a nutshell, I know help brands I love work with the bloggers I love in creative and mutually beneficial ways. It's the ultimate win-win! I also moonlight as a stylist from time to time. I love helping a brand create a visual look or work with a magazine to style a really compelling shoot. I don't call it my profession though - it's more my little side project!

Oh, my, goodness. Erin has style just oozing from her veins. Thank you so much for sharing your journey with us, Erin, and for setting a great example for what full-time blogging/consulting work can look like. It's a delight to have you over!!


If you're having trouble with the comments here, please feel welcome to send me an email at parscaeli@gmail.com or tweet me a note to @parscaeli

Itty Bitty Lovelies in Phone Photography

Welcome to a great week! How was your weekend? We watched C play her first outdoor soccer game and shivered as the hail came down on us, but then Sunday gave us warm, sunny skies (nearly 70 degrees), and we had some time for softball, some making, and even a run! Fitness, I will find you yet.

It's Monday, and Itty Bitty Lovelies is all about photography today - specifically, great photos from your phone. First off, are we buds over on Instagram yet? I'm @parscaeli, and I am on the hunt for some beautiful captures of the ordinary. Post your photos of the beautiful and mundane around you with the hashtag #celebratethenormal. The first round of shared photos will be posted on Wednesday (with a fun new prompt, too).

I'm always hoping to craft better photos and find something really interesting to share. Here are some reads to help you follow me on my quest to become iPhone photo amazing.

1. Quick tips to use your tech the right way

Kimberly at A Night Owl Blog has some reminders and great new info on photos from the phone. Things I discovered: how the HDR setting can make evening shots sing. I always wondered what that meant.

2. Filter something fantastic

I admit it, I find the myriad of filter choices for phone photography ridiculously fun. Veronica has seven photo editing apps to show off. What I love is the ways she shows the same photograph going through all the editing selections. I've seen more and more of VSCO CAM and PictTapGo. Which one did you fancy?

3. Bring Instagram to your screen

I loved this idea of bringing Instagram right to your desktop.. and you don't even have to be actively using the technology. Would you want to see your friend's photos refresh as you go throughout the day? Check out this find from Cool Mom Tech.


We have a busy week ahead with family heading our way for my oldest's First Communion. Crossing fingers for pleasant weather!! What's on your plate this week?

Let's make it a good one!

xoxo, MJ


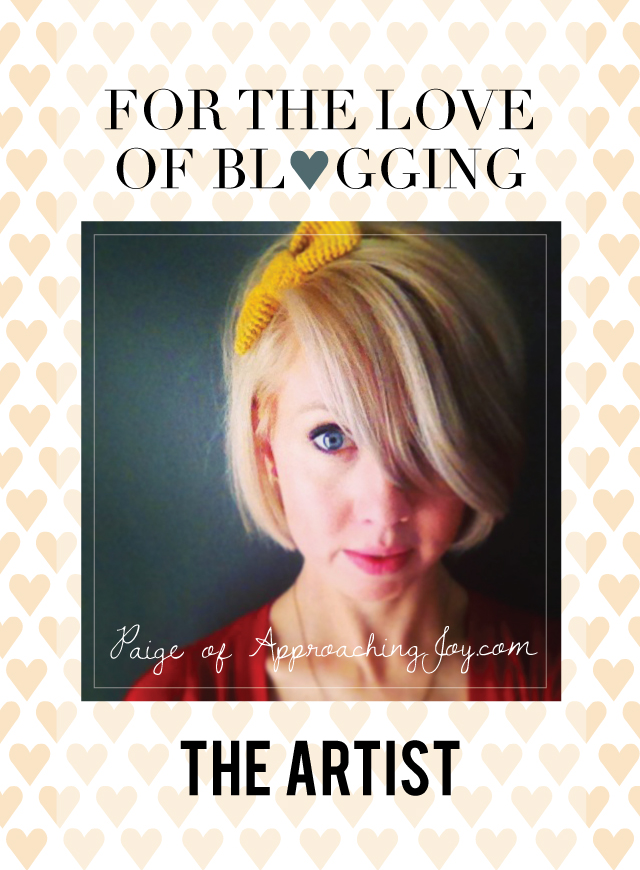
For the love of blogging: The artist

What's going on, lovelies? I am so delighted to kick off this new Thursday series on Pars Caeli. As I mentioned last week during Melanie's book tour post, we are celebrating blogging and bloggers all throughout the month of April.

Pars Caeli is one year today (see the very first post)!! And though I'd love to throw some great contests and offer gifts, this blog runs on a $30/month budget so instead I'm bringing you inspiration and wisdom (with some laughs thrown in) as my gift. I've lassoed an amazing cast of bloggers from various backgrounds and experiences; some fresh on the scene and some with years of experience. I hope their passion (and mine) for the great big blogging universe will encourage you to go after your dreams, both big and small.

First up, Paige of Approaching Joy. **Disclaimer: Paige is one of my favorite blogger pals. She and I are headed on a great adventure in AltNYC in June!! One year ago, she was also the lady who pushed me off the blog diving board to click "publish."


I started blogging at Approaching Joy in late January of 2012.  Before that I had kept blogs for a few weeks at a time but always got frustrated when I couldn't make my space "pretty" and gave up quickly thereafter. I actually took a blog design class in conjunction with starting Approaching Joy so design was less frustrating... kind of...


I say "kind of" because, when I was taking that first blog design class I spent anywhere from two to three hours a DAY for two weeks trying to figure out what I wanted my blog to look like.  It bordered on obsessive, and I think my roommates thought I started an illegal drug habit (since I spent most of that time in my room, yelling at my computer.)  I think I even blogged mostly about blog design in that first (icky) period.


Luckily, it was just one of those things that I had to get out of my system and then I could turn my attention to fun stuff.


I keep blogging because (wow, this is going to sound horrible) but I kind of feel like it's my pixel-child.  

Newborn phase: Design, establishing, and not a lot of sleep.  
Toddler phase: Learning what I need to learn.  Links, code, etiquette, tantrums, etc.
Elementary phase: Going out, meeting people, having fun.
Angst-ridden teen phase: Where I'm at now.  Transitioning from blogging "what I should do" into "what I want to do."  Oh yea, total blog rebel over here.


Most of my best inspiration happens while I'm away from the computer. Pinterest is cool but, personally, nothing beats a walk on a trail, a cup of coffee at a local shop, or a drive down a dirt road to really get my creative cogs turning.


I feel like I know the blogger behind the screen in all the blogs I read. At times this means I am interested but intimidated, empathizing over rough spots, or taken aback by someone's hard work.


But always, always, I can see their personality, or else I won't keep reading.


(I choose to answer this question in a "Zombies just ate the Internet" kind of way, instead of a "my computer broke, sad day" kind of way.) If I had to stopping blogging tomorrow, I would lose a sizable chunk of my personal community. The people I've "met" through my blog have become friends and sisters, people who I share inside jokes with, people whose children I care about, people who make me smile on a day when everything else is gray.


Serious sadness.


Outside of the blog I make art (which I am trying to work up the courage to share more often on the blog.)
Outside of the blog I make delicious dinners with my husband.
Outside of the blog I drink way too much caffeine, am allergic to the dogs I love, and try to be kind to everyone I meet.


I'm also trying to start a business that ties art into community and makes it a big part of my region's culture. But that's a big secret that I'm only willing to share with Pars Caeli readers.


Love it!! Thanks, Paige for gracing the pages of Pars Caeli and for your constant support throughout this first year. Follow Paige on Instagram at @approaching_joy to see some of her latest creations. And if you want to have some fun, engage her in some witty banter via Twitter.

Have a bright weekend, friends! I'll be saying a prayer of thanksgiving for each of you that stop by this site. It's been an eye-opening first year, and I hope to share so much more with you over the next 12 months.

xoxo, MJ

A Book Tour featuring Melanie Biehle

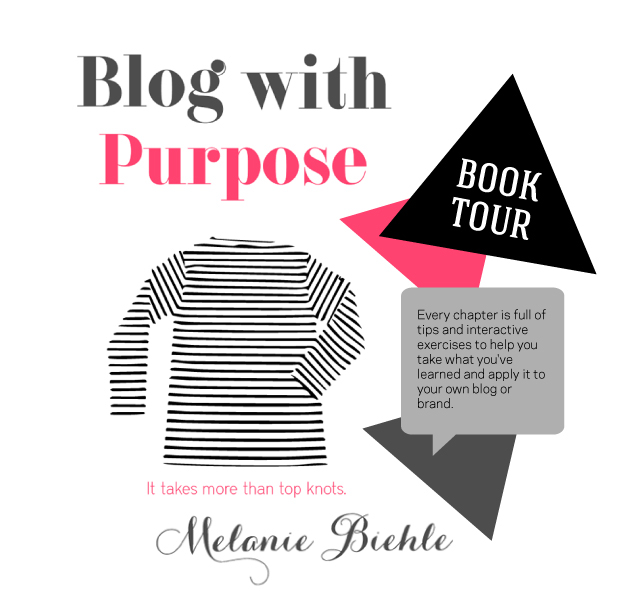
Hello my lovely readers! I have a magnificent surprise for you. I've hoodwinked Melanie of Inward Facing Girl and Genuine Mix into starting her new book tour right here with us on Pars Caeli. For those of you who haven't heard me rave about it yet, let me fill you in on the details. Melanie recently published her e-workbook, Blog with Purpose: It Takes More than Top Knots. If you're not in love just from the title (I was), you soon will be as you click through the powerful exercises and personal stories that will make you laugh out loud.

Other great news...Melanie is kicking off a new Thursday series on Pars Caeli entitled For the Love of Blogging, and she's agreed to answer all of my nitty gritty questions about what keeps her fabulous. Also, if you ever meet her in person, ask her for a hug - she gives the best. Enjoy friends!


I've been blogging since February of 2009. Actually, here's a funny story that I've never told anyone except Drew, and I only told him recently. I started an extremely short-lived blog in 2003 called "Kate in L.A." It was on Blogger and I might have written in it for a month or so (as "Kate") before I deleted it. At that time I was really into screenwriting and Hollywood and movies and I was living in L.A., so it was about local shops and the entertainment business. HA! But back to my real blog. I started that to get back into writing creatively again after leaving the entertainment world. Here's more about it, if you're interested.

Image by Sandra of Raincoast Cottage

Kate in L.A. is pretty funny. Other than that, probably the fact that I had left my name off of my About Me page for two years before I noticed it. :)


It's become such an ingrained part of my life that I can't imagine not doing it. It's like waking up and sleeping and eating. I won't say showering, because I probably blog more often than I shower. TMI? :) 

Ha...actually showering. I keep a notebook in the bathroom now to write down ideas that come to me underneath the suds. I started doing that because once I slipped down after jumping out of the shower and racing off to find a pen and paper to write something down so my poor postpartum brain would have a reminder. Being a blogger can be dangerous, kids.

Almost all of them are written by women (ALMOST) - the writing is strong, the design is good, and/or they reveal personal things as well as share cool stuff.
Wow. Everything would be different. What would I do with all that extra time?! Maybe I could start reading blogs again!  
 
I can give you a hint.
There's been such a good response to Blog with Purpose that I'm launching an online workshop in mid-April. It's a six-week interactive course all about creating content. There will be exercises, feedback, and a Facebook group for all participants. I'm even trying to work in a way to use Pinterest in one of the exercises because, you know, we like to pin stuff. 
Anything that's based in creativity makes me super excited, and this course is going to help all of us access that place in our brains where the cool stuff comes from. Let's learn how to create unique, fresh, awesome content together! If this sounds fun, be sure to sign up for my email list for more information on registration and launch dates.
______________________________________________________________________________________
Isn't she a charmer? And girlfriend knows her stuff, too. I've been working through the chapters from Blog with Purpose, and I have learned a ton. Melanie has set up a great series of practical, useful exercises that help you move your blog to the next level. I appreciated that her tone is aimed at digging deep and finding what you really want out of your blog and then helping you execute that dream.

Melanie gives you answers to all the questions you've been wanting to ask (how much should I charge? do I need a business blog?) and offers really great what-not-to-dos that have made me blush, knowing I'm a little guilty. No worries, I have a new plan already in place

I hope you'll take a look at her workbook; you can even download a free sample to get a feel for the content!

Big thanks and big hugs to Melanie. Follow Pars Caeli on Twitter to see her next stops on the Book Tour over the next two weeks or check over to get the complete line up on Inward Facing Girl.
xoxo, MJ
Itty Bitty Lovelies: The Beauty of Minimal

Hiya, lovely! How's it going? Exciting times around here...It's a great week of the year, the holiest one for Christians, as we gear up for Easter. My family is looking forward to all the services this week (with our oldest in the Church choir) as well as a fun egg hunt and Easter brunch with friends. What have you been up to?

Today I'm bringing you some Itty Bitty Lovelies that work with minimal supplies for maximum results. When you can create a masterful DIY with only a few items it's just that much sweeter, don't you think?

1. Tape saves the day again

Though I love art and photography, I don't have as much of it hanging on my walls or sitting on my shelves as I would like. Why? Frames are costly.

Jordan from Oh Happy Day posted this, and I just have to share it with you. Using kraft tape and some other supplies, she made these gorgeous thin frames for her home. The final look is remarkable, considering the low price of the materials. I am almost convinced that I need to buy my own matte cutter, too ($15).

Can't you imagine these in bright hues for a children's room or a classic black accent on book shelves?

2. Wall gallery for the no budget

Melissa takes us through the art that hangs in her bedroom in this lovely gallery made of simple frames she's purchased from Ikea. I adore the rhythm she's created on her bright walls. And learning the details behind each piece is delightful. It inspires me and reminds me that simplicity is more.

Head over to her blog and see what I mean. I think I'd love seeing all these frames hung really tight together as she has them in some of the photos. Have you created a wall gallery in your home? I'd love to see it!

3. Elegant bracelets for all the gals on your list

When I saw this post, I knew I wanted to savor it for Itty Bitty Lovelies. My good friend Joy from Frock Files has created the purest friendship bracelet that you could wear to the opera or the supermarket and look glamorous.

The way that she's stacked them is divine, and the closure method is genius. These are completely budget-friendly and the perfect spring accessory. Way to go, Joy. You've done it again.

My lovely for the week:

Life is better with friends. Be bold and ask someone, with whom you share common interests but not much time together, to join you for coffee. Invite that family you've been bumping into all over for a simple dinner. Arrange a Google Chat with bloggers you admire. Too often I imagine that others may not have time or an interest to get together, when the reality is, we're all just busy living our lives. A warm invitation does wonders for the spirit.

Let's make this a great week, friends. It's time to contemplate, refocus, and celebrate all that is to come.

xoxo, MJ


Itty Bitty Lovelies to Learn, Make, & Use

Have you been hit by a winter bug yet? We had one run its course through our house this weekend, and I'm officially saying Bon Voyage right now, so it better be on its way out. So sorry I missed you yesterday. Monday was just not as much fun without you.

Never despair, I have some Itty Bitty Lovelies to delight you.

1. Become a PMS expert

No, no, no, not that kind. Pantone Matching System, silly!! You've seen the term thrown around in all sorts of posts and pins. And who can forget that emerald is the Pantone spring hue? Well, the lovely Leonora over at Yellow Heart Art has broken down the vocab to make the whole system approachable. Check out her super informative Pantone post.

2. Rock a great handwritten font

On my life list? Create my own font(s). Have you tried the Ifontmaker app yet? Until I get around to it, I've downloaded Anna's tip top handwriting fonts. She made four different styles, and they're all free. And, if my handwriting looked like hers, I would already have a font for sure! These alphabets will look great on photos and on their own. You may even see them around these pages. Thanks, Miss Anna of Dear Friend.

3. Make lots and lots of minis

Usually I'm admiring Jillian's bravery and adventurous spirit. But now she's amazing me with this easy, beautiful craft that kids and parents will love. Jillian in Italy shows us fabrics that charm, wraps them around circular cork boards and pops them on the end of a bookcase. Check out the fabulous result that I totally want to imitate. What a cute gift for your favorite tween or a teen headed off to college.

My Itty Bitty Lovely for the week is this: you don't have to leave it all behind. I was a full-time teacher for two years. I've taught a handful of classes here and there. My career path has taken me in a different direction, but part of me still yearns to be in the classroom. This weekend my husband (also a former teacher) and I had a chance to teach together, and it felt really good to be back in the saddle.

It reminded me that even when we chose something different from where we've been, we can still carry on the goodness that remains and come back to it again and again.

What are you bringing to this week? I'm excited to dig in.

xoxo, MJ

AltNYC, the party before the party

After years of following along with the events, classes, and conferences put on by Alt Summit, I am taking a leap (in my yellow heels) and going to AltNYC. Needless to say, I am over-the-top excited about this gathering of fabulous bloggers, interesting sponsors, and experiencing Martha's HQ for the first time (I'm sure she'll invite me back).

I've been doing some behind-the-scenes research to get this party started, and I've started a fabulous list of blogs and authors who are headed to NYC on June 20.

Head over to my Pinterest page and follow the AltNYC board. I've opened it up so that you can pin your blog, and we can all get to know each other before we ever hit the big city. (And you won't be creaped out if I know your name before we meet.) Leave a comment with your email address or send me a direct message on Twitter (@parscaeli), and I'll invite you to pin. Please add the names of other bloggers you know who are attending!

I am delighted to feel all this talent in one spot! If you're not headed to AltNYC, follow along here to see what it's like to experience not only Alt, but NYC for the first time through Pars Caeli. Yikes!

xoxo, MJ

PS. Go grab the code for your badge over on the Alt love pages. I'll be looking for your yellow circles proclaiming I'm headed to AltNYC!

PPS. You can also send me an email at parscaeli@gmail.com to get access to the board!

Itty Bitty Lovelies with High Quality Results

Helllooo, lovelies! It's Monday of a new week, and we're going to rock it. I'm a little off from these wacky time changes, but I am soooooo ready for spring.

To start off these bright days, I have three high-quality DIY projects, and by that I mean that you will spend so little time on these efforts, and yet you will come out looking like a crafting rockstar. Yes. A huh.

1. Your very own wax seal design

Ever since my senior thesis, I have been in love with wax. And a good wax seal, perfection! So the brilliant Lexi over at The Proper Pinwheel has integrated the use of buttons to create unique shapes and patterns. Head over to Whimsey Box, grab a few spools and your favorite buttons, and get ready to share some loveliness.

2. A new take on Easter baskets

The beautiful Brittni from Paper & Stitch has a fresh take on the tried and true mini Easter basket. And she offers lovely options if you don't want the traditional handle. Are you hosting a great Easter brunch? These would make brilliant placecard holders or dynamite decor sitting around your home.

3. Cut out leather cuffs

These are my fave. Melissa is talented in every area, and I adore her take on jewelry. She offers a super simple leather cuff (no, really, it is simple). And with the cut outs, leather transitions so perfectly to spring and even summer. Friend, if you and I make these, everyone is going to be asking us how we afforded such amazingness. And we'll snicker.

My little lovely for this week: Go with the spontaneous. I know, we have got to plan more and get more things done and accomplish, accomplish. Oh yeah, and succeed. But, you know what? When you feel the urge to call up a friend? Do it. Treat someone you love to breakfast. Definitely. Offer a hug, even in an awkward space. It's right.

I spend a lot of time planning, but I've so appreciated moments this week when I just went with my gut. This one's for you.

Special thanks to the beautiful people who offered their words on this post.

xoxo, MJ


Itty Bitty Lovelies To Charm You

March Mondays! Welcome to them, friends. We're going to make them grand. How was your weekend? My oldest daughter had the experience of her first Reconciliation on Saturday, and she was so excited to feel "lighter" afterwards. Other than that, ours was a pretty lazy weekend with errand-running and movie-watching topping off the excitement.

We're going to fill March with warmth and charm, and I found some super easy ways to do so...

Extend the Bloom Time of Your Tulips


This amazingly simple step will keep your tulips blooming for extra days... and you likely have what you need at the bottom of your purse. Pop on over to see what the ladies over at Sweet Lulu have to teach us.

Color Twine in Your Own Kitchen


Victoria from A Subtle Revelry posted a nice tutorial on dying twine on Mint's blog, Julep. Everything we need to change inexpensive twine to something much more fabulous is sitting in our kitchen cabinets! Ack, so easy and charming, too. Pair some of this fabulous twine with kraft paper for a classic look.

Organize in Style


Kendra shares such a cute storage solution that pairs twine (yes, let's use some of the beauties we just dyed) and cotton drawstring bags. It is so darling, in fact, I consider these final product good enough to gift! Check out her simple solutions and follow along with her new organizational series over at Piece of Cake/Peace of Mind.


Here's what I'm finding really charming these days: work date nights with my hubby. Say what? Yes, really. In the last few weeks, my hubs has taken me on quite a few work dates to great local restaurants, and I've had the pleasure of seeing him through his coworker's eyes. He's incredible at what he does, and I kinda fall in love with him all over when I see him in his element. Extra bonus: all of these meals have been delectable!

Am I crazy or do you, too, enjoy seeing your loved one in work mode?

Here's to a great first week of March.

xoxo, MJ


Chat It Up: Color Must Haves

Heya! Thanks for joining the chat today. I'm home with my little guy and his yuck case of pneumonia. Let's get to talking to cheer me up, k? The topic: color. Specifically the colors we live with and the colors that scream, "this is my abode."

From every window in my house, a static perma-gray landscape can be seen. Living in Northern Indiana, I'm used to at least five months of monochrome. I deal with it by putting a whole lot of color in the interior. Remember the show Trading Spaces? Where they'd take over a neighbor's room and make it a new funky color or glue flowers to the walls - all in a super short period of time? Well, I used to be all about that show especially all the bright hues they'd add to any old dull space.

In the last two years, I've transitioned our main living spaces into more neutral tones to allow just bits of color to be more of the focal. Our once monarch orange kitchen (it was lovely, I promise) is now a classic khaki. And for the most part I'm happy with these more calming neutrals (my house has moved out of the 90s). But there are two rooms whose color I think I "need" to both cheer me and calm me.

Our dining room: For the last decade it's been this ladybug red color, not too bright, not too deep. To me it's the perfect shade of red lipstick and with the wood moulding to frame it in, the saturated tone whispers sit down, stay a long while, and eat, eat, eat.

Our bedroom: I've never had a green room in any house/condo/aptmt I've lived in, and I wanted to give it a try. I found a swatch called "rejuvenation", and I knew I wanted that in my sleepy, cozy, dreamy space. And I adore it. It feels fresh and warm at the same time, and I now identify this color as part of me.

So tell me what colors must you have around your living space? I'm not talking about your favorite colors necessarily, but what feels good for you to live in - that you'd take to another living space just because it's part of you?

Or am I just crazy color lady?

I'm okay with that.

xoxo, MJ


An Itty Bitty Move

Happy day after Valentine's day, lovelies. Good things are happening all around. Are they over in your corner of the world, too? I hope so... sending some right now to you.

Just when I thought I was into the new groove and this blogging schedule thing, I'm switching it up. These Itty Bitty treats are moving. They'll now greet your week on Mondays. I'm hoping they'll inspire the simplest and most rewarding of projects and ideas as you set foot out into a new week.

Plus, I've kinda been missing our time together on Mondays. Just because.

So I'm saving some surprises for Monday. Catch ya then.

Wishing you a bright weekend.

XOXO, MJ

A DIY for Lent
PC_PaintingforLent.jpg

Amidst the super cute, heart-shaped posts and the irresistably pinnable pink and red vignettes floating around the interwebs, I'd like to offer a DIY to break you into... Lent. For those of you who may be confused, this year Lent (the season leading up to Easter) began yesterday with Ash Wednesday and will continue for the next forty days. It's a time of reflection and growth, where we reserve our Alleluias and songs of praise, and focus inward on the change within ourselves. So why not have a DIY to accompany it?

Tell me you've seen this technique on Pinterest... The one where you use a canvas painting and adhere text, like vinyl lettering over top of it, paint over the entire surface to then remove the vinyl letters and reveal the great quote constructed from the colors and strokes of the painting underneath? Yes? No?

So that one got me thinking... how about a little Lenten project?

PC_paintingforLent_1.jpg

Here's what you need (or what we used): 8 x 10 canvas, assortment of your favorite paint colors plus black, brushes, vinyl letters.

PC_paintingforLent_2.jpg

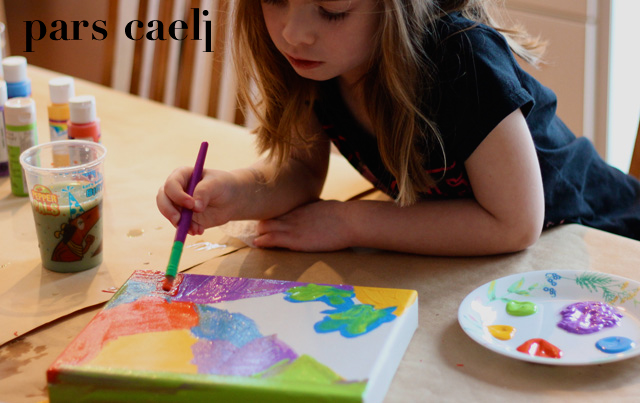
My daughters were d-lighted to be involved with this one. I asked each girl to paint one half (diagonally for interest) in five of their favorite colors. As we brushed on the brilliant and quiet tones, we talked about our blessings, many of which the girls represented in their pictures. After the paint was definitely (ack, so much patience required) dry, we added the vinyl lettering, careful to place each one squarely in place.

PC_paintingforLent_3.jpg

Before adding a black layer over the entire top surface, I used a pen to press down the letter edges to be sure no sneaky paint would leak underneath. Here's our creation, full of color and blessings.

PC_paintingforLent_4.jpg

Time to cover up the Alleluias and keep them in waiting until Easter. Check out the cool texture that's revealed.

PC_paintingforLent_5.jpg

And then it's all covered.

PC_paintingforLent_6.jpg

So.. in another 39 days, I can give you the grand reveal.

PC_paintingforLent_7.jpg

Wait, wha? Seriously? A DIY cliffhanger. Here's what we'll have on our table throughout Lent, reminding us of all that we've been given and reminding us to let our goodness shine through the darkness.

The final product will be reposted here on Easter. Happy Lent!

xoxo, MJ

Itty Bitty Lovelies - Bonus Edition - for Valentine's Day

This is what I've been staring at the last few weeks. Lots of whites and shades of gray (no, not that one). Perhaps that's why I'm craving touches of red and Valentine's to satisfy my need for color and celebration.

What are you doing to keep the blues and grays away?

Tic, Tac, XOXOs

Jenn over on the ModCloth blog has this super simple idea of transforming simple flathead tacks with nail polish! Lovelies, we could do this in a few moments. How cute to paint some simple hearts on these and pin your love notes up for those you hold dear? I'm hoping to pull out some red polish and create Valentine goodness.

Feel the Love

You all know I can't resist an easy paper craft. Jessica over at How About Orange has a two-step process for irresistably simple three-dimensional hearts. Seriously, when you see the instructions, you'll wonder why you never thought of it. And her use of loads of little and bigs on a wall totally inspires me to fill a room with these expressions of love. Can you imagine lining them up as a pathway to a great little dinner you've planned for just the two of you? Hmmm...

Showing My True Colors

I saved the most genius for the final link. Brittany from The House That Built created a unique Valentine wrapping paper that tops the cake. That first method of cutting and folding shapes to reveal a burst of color below, to die for!! What do you need to also become the crafter extraordinaire? Two different colored papers and scissors. This method could be wonderful used for Christmas trees in December, balloons for birthdays, stars for special achievements... the wheels are turning.

My Itty Bitty this week?

Before you head out the door or start into your first task, text a few lines of love, encouragement, or just sillyness to someone on your contact list. This week, I've been sending them to the hubs, local friends, far away friends, and the responses are always immediate, grateful, and full of joy. It's better than brownies for breakfast (I had to do my own experiment, of course, to be sure).

Have a bright weekend, friends, even if the skies are gray.

XOXO, MJ


Itty Bitty Lovelies for Valentine's Day

Here's some new Friday fun for you, my lovely friends. Itty Bitty Lovelies will include some big and small ideas and links that I've found that won't require you to invest your entire weekend (or take a short vacation) to accomplish. These snippets are scrumptious morsels that you can work into your everyday and make it just a little bit more magical. I'm even throwing in a very practical tip or two that I've discovered during the week. Most of these will not be asteroids of unbelievability, but they may just make your life a little bit easier... and that would make me more than itty bitty happy.

1. Cinnamon Rolls in a Lovely Shape


Do you make the delectable cinnamon roll in your house? These look so good. You can move away from the traditional spiral to an endearing heart shape. Super easy with big impact! Check out the recipe over at Cake & Allie.


2. Monkey Love


This monkey craft is great for a class Valentine or a little homemade love for your near and dear. I'd love to see it in red and pink for an extra obvious Valentine feel. You can do this with the kiddos if you have a half hour to spare. The crafters over at Fiskars have all the info you need.


3. Everlasting Fortunes


Felt fortune cookies? Yes, I see them in your future. This one will be a trip to the craft store, but the finished effect is awesome...and would be perfect for that very special announcement or enduring declaration of love. The brilliant contributors over at Honest to Nod have the deets.


My itty bitty discovery this week?

I am a much happier human being if I can get school lunches and snacks packed before dinner. What's the big deal? I'm not sure, but it's definitely a daily pick-me-up to know that my evenings are clear for work, blogging, and chilling with the hubs rather than food prep. What's your thought?

It's big, bad, beautiful to be back with you all. Thanks for visiting. Come on back next week; we'll have a good time.

XOXO, MJ


A tri- to try for holiday prep

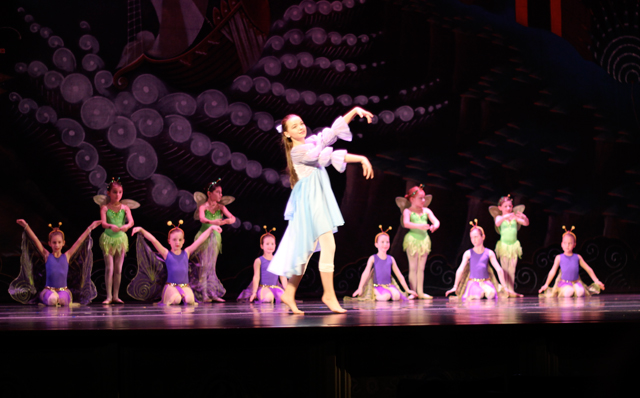
Our holiday season is officially off and running. With the Nutcracker performance last Saturday (my daughter M is one of the purple butterflies) and hours of decorating our home, it's beginning to look a lot like Christmas around here. We'll be celebrating the close of November and December beginnings this weekend as well as the first Sunday in Advent (light that purple candle).

I have been starring and pinning and dog-earing some great ideas for holiday preparation, and I'm excited to share three wih you today...


1. MAKE PRETTY BUNS

Joanna always has the cutest hair tutorials for those of us with long locks. Now she's put them all in one spot for us to plan and primp for the next holiday party. I've been seriously contemplating returning to the chin-length bob but these have me convinced that I should wait and have a little more fun with my length. Which ones are your faves? I'm crazy about the chestnut bun and the ponytail twist.

2. PUT TOGETHER A COUNTDOWN

Advent calendars are the perfect way to make every day special as we build the anticipation to the big day. Babble writers found some creative countdowns that would be great for the crescendo of Christmas prep. They could also be easily converted to wonderful ways to get excited about upcoming nuptials or a lovely future trip. Check out some of these clever ideas.

3. GET YOUR DIY ON WITH THE BEST PROJECTS

I've taken a couple of classes from Victoria over at A Subtle Revelry, and I have left each one surprised by the number of super helpful strategies that land in my lap. Victoria is giving all of us one heaping big DIY package of assistance in the form of her well-designed and styled holiday issue. In it you'll find recipes, craft ideas, nice uses of typography, and charming photographs. Page 11 is ultra fun and useful and the spread on cranberries is fabulous and informative.

Wishing you a bright and merry weekend. Hoping this web home will get some holiday fa la la la adjustments over these days, too. We'll see.

XOXO, MJ

Prepping for Advent: Make a Jesse Tree
PC_jesse1.jpg

Friends, have you noticed? Christmas is just around the corner. This Sunday marks the first Sunday in Advent. It's the first of four Sundays that lead us right into Christ's birth.

I've seen so many adorable Advent calendars (that begin on Dec. 1) like this one, and I want to share a different kind of countdown we use in our house. I made these for my parish with about 100 other families last year, and it's a super fun family craft to make and keep for years to come.

Have you heard of a Jesse Tree? It's a way to get the kids involved in the countdown to Christmas while learning more about the family tree of Jesus. Through each ornament, from creation through the Old Testament. Usually a Jesse Tree would be made from branches with ornaments hung from the branches. We made ours in the form of a banner that can be easily stored from year to year.

We used our family hands to create the tree. With our family of five, we had each person trace their right and left forearm and hand. We became the branches from which the (velcroed) ornaments hang. I adore that I will have those little hands forever captured as the tiniest of branches.

PC_jesse2.jpg

Wanna make one? Here's what you need:

  • 1 yard of purple felt (it's a traditional Advent color)
  • 1 yard of brown felt for the limbs and trunk
  • Printed or drawn symbol ornaments
  • Velcro to attach
  • Dowel and ribbon/twine to hang.
  • Fabric glue or hot glue

Lay out your felt and trace forearms and hands. Cut out and arrange limbs on purple felt. Cut out a rectangular trunk to fill out the bottom of the tree. Glue down. Print and cut symbols. Laminate and add adhesive velcro (only one side is needed to stick to the felt) to the backs. Wrap the top two inches of the purple felt around the wooden dowel and glue down the edge. Knot off twine or ribbon from the dowel to hang. Viola! Keep your waiting ornaments in an envelope near your prayer booklet until they're ready to be used.

Currently our ornaments are paper. My oldest daughter has expressed a desire to recreate the images so I'm looking forward to capturing her artwork this year or next and making these circles a little bit more time-resistant.

PC_jesse3.jpg

All of these supplies are incredibly easy and affordable for bulk buying if you want to make a lot of Jesse trees at once with your Church or school group.

The Diocese of Erie has a lot of helpful Advent resources, and our ornaments and the booklet I created came from their writings. Find the complete set of reflections plus small and large versions of the ornaments here. All of the illustrations by Carolyn Pikoulas and text by Anne-Marie Welsh for Faith magazine, published by the Diocese of Erie.

Ann Voskcamp and Nancy Rodden also have a great free printable book that includes full color illustrations of each symbol and examples of very cute felt ornaments can be found over at a Shower of Roses.

Here's the copy of the booklet I created for our Church and our home. We keep it on the dinner table and add an ornament every evening (when we also add a piece to the Nativity scene and light the Advent wreath - we're all about evening traditions). The booklet takes you through what symbol to add for the day and even bring the Scripture in so that you only have to go to one place for the reading and reflection. I promise the this ritual won't add more than 2 minutes to your dinner time, and you might be surprised by how quickly this activity helps (you and) your children get a handle on the major stories of the Bible.

PC_jesse4.jpg

How do you count down the days? Do you have a special calendar or tradition to take you through Advent?

XOXO, MJ

A tri- to try

Hi friends!! We're wrapping up our time away today, and we'll be back (exhausted) and ready to celebrate Thanksgiving next week. In the by and by, here's what else you can make festive this weekend. Today it's all about buttons so grab your collection and spread them out for all to enjoy on National Button Day. Grab your coat and hat on Saturday and let's enjoy the great outdoors for National Take a Hike Day. On Sunday we'll be ringing in the final day of Games and Puzzles Week. What's your fave? I'm a huge Othello and Upwords fan.


1. CLEAN THE IMPOSSIBLES

I'm on my laptop, my phone, or the Ipad everyday...and so are my children. Strange things get stuck or deposited on the keyboard and screens. Sometimes I just want to get out the leaf blower and push all those germs out of the way. Instead let's try this. Check out this short, easy video from Momiverse on how to clean all the technology in your world (without specialty cleaners). You'll also find out what device is the dirtiest of them all.

2. BANISH THE WHITE WALL

Jessica over at How About Orange has curated a fabulous stash of DIYs we can each do to spruce up that (or those) blank walls. Check out this board, and if you're not following her on Pinterest, go ahead and do that, too. You can pin some of these to your super secret boards!

3. RETHINK THOSE BOXES

One year ago we embarked on the journey of home renovation, and it was definitely an experience as much as an end product. It began as an effort to extend the laundry/mini-mudroom we enter off of the garage. The overflow of shoes, backpacks, and laundry baskets was becoming a fire hazard and an unwelcome greeting to our every entrance.

When we reviewed the plans, my husband and I realized we were beginning a domino fall. Move the laundry? Well, that means we should finish off more of the basement. Take down that wall? Move that stud? Well, you get the idea. In order to complete all that needed to be done, we packed up the playroom (you know that space that has every small toy, party favor, and leftover artwork in it?), and the contents of the entire first floor of our house.

Wanna learn how it turned out? Follow me over to Frock Files to hear all about it. I'm guest posting for Miss Joy over there... Tag, you're it.

Let's have a bright weekend, friends. We have much for which to show our gratitude.

XO, MJ