Posts in DIY
Make It Monday: Treasured menus

Happy Monday, friends! How was the weekend? I hope the time change was easy on you. I was so delighted when my children woke me up at 6:45 on Sunday (I was prepared for a 5 am wake-up call).

I've got Thanksgiving on my mind. You? I'm just beginning the process of menu planning and decor prep. Since we moved into real life Pars Caeli (our home), we've been the hosts for Thanksgiving, inviting my in-laws and my parents as well as my grandma-in-law and my aunt on rotating years. My hubs handles the big bird, and I tackle the everything-else on the menu.

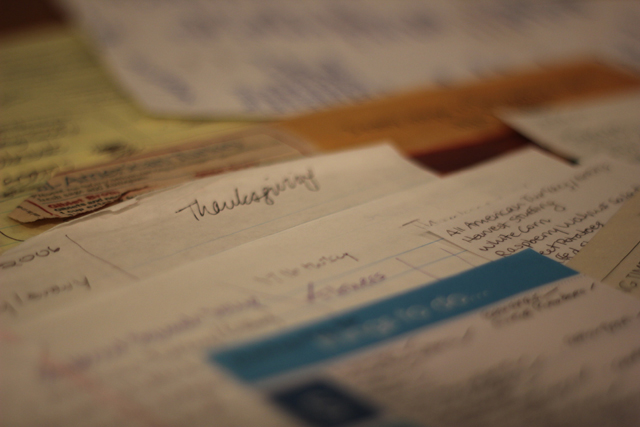
Do you save old menus? I'm kind of a fanatic about it for big family meals. I have our Thanksgiving and Easter menus and shopping lists from the last 10 years all tucked in a binder together. We have old favorites we repeat (that harvest stuffing is a must), and I try to rotate in some new, even trendy, treats every year. Many of these lists are on calendar planner pages or used envelopes, a few on lined paper or legal pads. Every year around this time I read through them and remember the tastes and delights of our years together.

We have a fun Thanksgiving tradition for all of our guests that I'll be sharing with you next Monday! Today, here is the special family recipe for an amazing stuffing that you'll enjoy for days and days after the turkey and family have left. It's adapted from a 10-year old recipe that Parade magazine published. My husband, mom, and I have made this together almost every Thanksgiving Eve, and the laughter and tears (from the onions) make the stuffing ever more savory.

Harvest Stuffing (that's a little piece of Heaven)

You'll need these to stuff a 15-18 lb turkey:

  • 2 T of vegetable oil
  • 4 C each chopped red onions and celery
  • 2 T minced garlic
  • 2 T dried thyme
  • 2 T dried sage
  • 2 Granny Smith apples, diced
  • 1.5 C each dried cranberries and dried apricots
  • 2 C chicken broth
  • 12 C cubed (1 in) bread, toasted

Heat your oil in a large pan, stir in the onions, celery, garlic, thyme, and sage. Cook over medium-low heat for 15 minutes. Add the bread and fruits. Toss well. Drizzle the broth over the mixture to moisten and season with salt and peppers. Be sure it's cool before stuffing it in the turkey!

So simple and tasty!

What's your Thanksgiving favorite?

XO, MJ

Make It Monday: Not Making It

Happy Monday, friends! Did you know that Halloween is this week? If you live in our house, you could not NOT know because my younger daughter, C, has been announcing the countdown every morning. Yeah, she's excited to don her Belle costume with tiara and all.

Today's Make It Monday is a little different. First, I'd like to high five, hug, and congratulate all the mommas out there (and grandmas, aunts, and friends) who have worked and designed some beautiful costumes for their littles. Louise has made some gorgeous looks for her girls, and I know Sandra will be revealing her unicorn costume for the girl this week, too.

I'm the daughter of a momma who sewed my costumes all the way through middle school, and I was that child that always put forth a challenging idea. She put together Miss Piggy, Rudolph, a bunny rabbit, a mouse, a Hershey's kiss.. and many more. Part of the fun was thinking up something I didn't think I could find, and having it fit right to me by my very own mother. She's a talented lady.

When I became the momma, I took it as a personal challenge and a near-necessity that I sew my children's Halloween costumes. To many this is very normal, fairly easy, and happens like clockwork every fall.

For me, this was a process, over two months of work, and nothing close to easy. You see the first costumes I made for my girls. M was a dalmation pup her first trick or treat season, and C was the pumkin bunting I'd always wanted to sew.

For the first four years of motherhood, I sewed costumes. In fact, much of any free time in the Augusts, Septembers, and Octobers was found with me sitting on the couch, hand sewing each piece. My mom, in an effort to simplify my life, bought me a Singer sewing machine, but I always returned to the handstitch because I loved the feel of needle-and-thread creations.

When my oldest daughter turned five, she quickly turned into a young version of me, ready to challenge her momma with some creative costuming ideas. Eeps. So we hit Joanne's in August.

By September, she had changed her mind and wanted something different. Two weeks after that she changed again.

October came, and she had still not decided for sure what she wanted to be. I was stressed, I was making her stressed (why does Mommy keep asking me about Halloween?), and I was dreading Halloween.

I read this post from Meg last week, and it got me thinking. Go check out point 2.

And I'd like to send all of you very talented mothers out there who are NOT making costumes this year (or any year) a big smooch.

I gave it up. Or at least for now. Why, say you? Because frankly, my daughters wanted to be princesses with all the Disney, glitter, and plastic high heels that I could find for them. My son wanted to be Elmo with the big googly eyes and red furry paws. M wanted to change her mind four times and then change it again once she saw the Halloween costume catalog that arrived at our house.

And, more than I wanted to be the mother I had preconceived notions of being, I want my little goblins to be happy.

I want Halloween to be a fun day, filled with candy and neighborhood greetings. I'm done with the stressed fall season and trying to box in my children's creativity and indecisive natures.

And - honest here - Halloween is not an important holiday in our family, at least when you compare it to the real and made-up ones we treasure (eg: Thanksgiving, Christmas, Sisters Day, Yes Day, Easter). And I was spending months dedicated to something that would come and go for a day or less.

This year I'll be walking the 'hood with a goddess, Belle, and Elmo. They are so excited to break into costume.

And I'm delighted not to have trick or treat bags under my eyes any more.

XOXO, MJ

PS. Where do you fall? To buy or to sew? Or somewhere in the middles?

A tri- to try from my friends

Hello Friday. Hello friends. Today we're celebrating National Pumpkin Day. What's your favorite color pumpkin? I'm loving the green ones this year. Tomorrow will bring in National Potato Day. And I have a great way to live this fabulous holiday with a treat below. My hubby is honoring Mother-in-law day on Sunday with his stacks of blueberry pancakes (and a visit from my parents). What are you up to?


1. MAKE A SPUD SPECTACULAR

My friend, Sheri, over at Donuts, Dresses, and Dirt (great blog name, eh?) posted an easy way to enjoy for all of us to embrace National Potato Day. These yummies come out crispy and are cooked in the microwave!! My hubby and I love sweet potatoes, but our kids are not so keen. Maybe this will win them over? It's all in the name of holiday, you know. Check out the super simple recipe.

2. WIN OVER ANYONE IN YOUR NEIGHBORHOOD

My pal Joy from Frock Files is over at You Are My Fave this week sharing a recipe for healthy corn chowder. I am a big fan of corn + soup. Joy made this sweet recipe as a dinner for a neighbor, and you have to check out how she packaged it all up. Do you have someone in your life who could use a surprise dinner? I know I do.

3. CHANGE YOUR FACE

Get ready to pin this one. My gal, Caroline, from Salsa Pie created this fun Face Mat for kids. It's 2D Mr. Potato Head but so much more chic. My kiddos would love this, if they'd be able to get it away from me. I love how she captured so many different expressions in these photos!! Caroline is creating the most amazing crafts these days so if you're not tuning into to Salsa Pie, you are missing out.

That's it from here, friends. We're hosting my parents for the weekend and taking in some fall sites... this just might be our last weekend to do so. What do you have going on?

XOXO, MJ


Make It Monday: Herringbone Tray
PC_makeitmondaytray4.jpg

Happy Monday, friends!! How was the weekend? We hung around and raked leaves, watched some football, and handled some crafting, too. As y'all know, I'm a great adorer of autumn (yo, Instagram friends are you tired of my leaf photos yet?), and I've been looking for ways to get my indoor spaces decked in color, too, as the leaves now begin to shed their brilliance and Halloween is coming right around the corner.

I don't do spooky or the darkness of Halloween, but I was inspired by the shapes and lines of Landee See, Landee Do's holiday post. And I thought it'd be fun to transform a great tray that I've had for a while and DIY it up.

PC_Makeitmonday.jpg

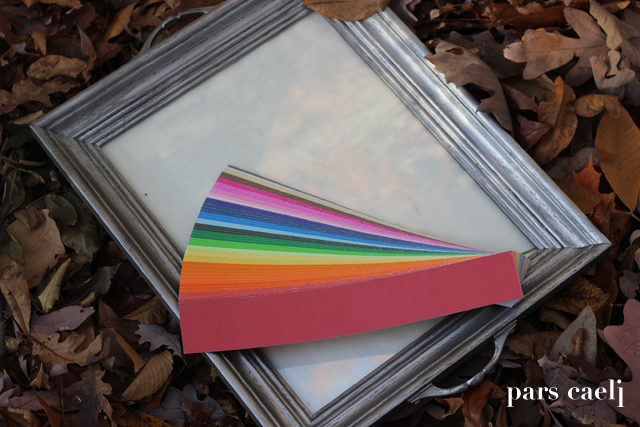
Here's what I used. This great tray was a DIY present from a dear friend for our wedding. Chris converted a large frame into tray through handles and paint. I added some great colored cardstock in complimentary Halloween shades of orange, black, white, and gray. And pulled out the paper cutter and some glue!

PC_makeitmondaytray.jpg

Herringbone has been on the brain lately as I see fall fashions appearing in stores and catalogs. It's a simple geometric pattern that my daughters loved putting together with me.

PC_makeitmondaytray1.jpg
PC_makeitmondaytray3.jpg

I love the great graphic quality, and it's the perfect perch for the growing mounds of mini pumpkins and gourds we're accumulating.

I'm also planning on mounding it up with candy (way more than pictured here) for our adorable Trick or Treaters next week!

PC_makeitmondaytray5.jpg

How do you deck your house for Halloween? 

XOXO, MJ

A tri- to try all about pumpkins

Friday, Friday!! Three cheers for Friday. Are you ready to celebrate the weekend? Let's go out and meet some new folks (or hop over to their blogs) today on New Friends Day. Tomorrow we're getting our Hallmark on and letting all those we love know how much they mean to us on Sweetest Day. Sunday is National Pumpkin Cheesecake Day, and today we're honoring my love for pumpkin with all the great ideas on a Tri- to Try!!


1. BECOME A NEW FAN OF PUMPKIN AMAZING

This is so good, my friends. So good. When Melissa of Lulu the Baker posted this recipe for Pumpkin Crumble, I knew that I would become an instant fan of such goodness. The photos alone had me.

I also loved hearing just how much her husband loves this special treat made just for him. :)

2. PULL APART THIS DOUGHY DELIGHT

Jessica from Sunny Side Up has it all going on with this incredible recipe for Cinnamon Sugar Pumpkin Bread. Ripping off this sugary sweet goodness would be a fabulous way to spend the weekend, don't you think? The recipe involves all sorts of fall favorite ingredients (yum for rum), and I'm pretty sure any guest would remember this scrumptious dessert and hope to be invited back for more!

3. WIND UP ITTY BITTY PUMPKIN FUN

Gina from Desperately Seeking Gina invited me over to her Month of Pumpkin. She's had mouth-watering pumpkin recipes day after day. I added in these silly, simple balls of pumpkin.

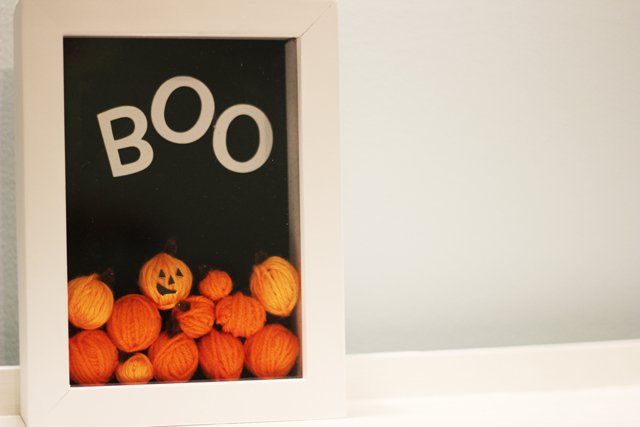
You need no great crafting skills, just some orange yarn, a pipe cleaner, and some black paper to make a whole bunch of little pumpkins. Hop over and see the process. I think these would be fun filled in clear glass jars on your Halloween table or set out as placecard additions.

I'm working on a fun treat for a great friend and blogger that I'm excited to show you next week!! We'll be working on the house inside and out this weekend and hosting some family, too. What are you up to?

XOXO, MJ


Make It Monday: Typography Results!

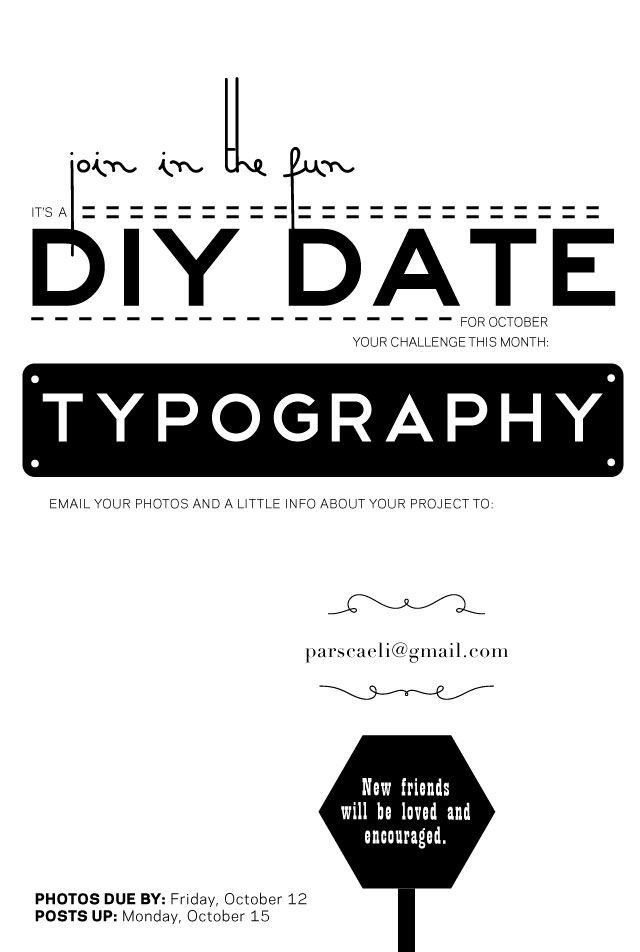
Happy Monday! It's party time over here at Pars Caeli. I was super duper lucky to be able to host this month's DIY date, typically hosted by the amazing Louise. She let me pick our project, and I chose one of my faves - TYPOGRAPHY.

I've been a font nerd ever since childhood when I remember loving certain picture books because I liked how the letters looked. And now... I am delighted that I could convince some talented ladies to show their letter love, too, through beautiful art pieces. Check out the links below to read the stories behind these pieces and in some cases, download your own versions. From all around the interwebs I present to you, our DIY date:

1. Emily (a real, live amazing artist) created this piece in honor of her blog birthday. Inspired (go get it)!

2. Joy, style queen and talented writer, brought love to life in her print (just for you, too).

3. Louise, both poet and painter here, made a rich canvas of word and color (I so enjoyed the meaning behind it all).

4. Brynn, full of flavor and fun, brought this whimsical quote to real life. Check out her mad skills.

5. Erin finds art that rocks my world and now she's showing us (yes, tutorial) how to use Photoshop to make cool images (like this lovely) for ourselves.

6. ME! I've been wanting to do something with transparencies, Helvetica, and one of my favorite quotes/hymns (take it for your space, too). Read below to find out more.

Hugs to all these wonderful women who designed, crafted, and prepared one-of-a-kind awesomeness. I feel so blessed to be able to host it all here at Pars Caeli.

I can't wait to see what Louise has ready for us in November. Wanna join us?

If you'd like to download Julian of Norwich and my co-creation (smile), you can download it here. Julian was a woman far wiser than I with divine inspiration and knowledge of our place in God's plan. It is said that God appeared to Julian and spoke these words.

…All shall be well, and all shall be well, and all manner of thing shall be well.

Life's molehills and mountains can wear me out. And I can find myself staring more at my feet than looking ahead or around at the graces that lie right where I am. In the tumult I say to myself, All will be well. And now it's perched right at the bottom of our staircase to remind me as I walk my kiddos downstairs for breakfast or run frantically around to get myself ready to go.

XOXO, MJ


A tri- to try

How is it Friday already? We are painting, painting, painting in our house with all three children's bedrooms getting fresh coats. The nursery will now transform into the "nook" where all three kiddos can go to read and draw and just hang. The wall murals that I painted when I was pregnant with my oldest daughter are now covered over with a fresh coat of Palladian Blue. No lying, I was more than a bit melancholy about the transition.

But good things await so let's get on with the living!

Spend some time today crafting and consider yourself particularly talented. It's not too late to craft something awesome for our DIY date. Remember what this month's project is? For you extra special, busy people, I'm extending the deadline to Saturday. Just send over a photo and explanation of your work to my email (parscaeli@gmail.com). If you're a blogger, all posts should go live on Monday am, and I'll link right to them!

While you're creating, grab yourself a handful of Hershey's kisses and Hershey's chocolate bars and offer a big shout out to Milton Hershey who died on October 13, 1945. But keep some extra chocolate on hand for Sunday because the world is celebrating National Dessert Day, and you do not want to be caught without the best course of every meal.

Here's a Tri- for you to Try this weekend, friends:


1. STRIKE A POSE, MUMMY

Mini mummies? Oh, yes. Click over and see what Jen has set up with these posable creatures. So cute and so fun. Jen always has the best ideas. Check out some other mini Halloween decorations that will make you wish you had eaten Alice's candy and fallen down the rabbit hole to this tiny goodness. And while you're over at Classic Play, please take a gander at Caroline's adorable Halloween Straw Toppers.

2. BE THE COOL MOM

Mariah from Playful Learning has three great tips for how to host a great playdate. I loved her practical, generous, and child-centered approach to a day of fun with friends. Click over to read and see her great set up, her menu for fun and healthy, and a little something extra she keeps in her back pocket.

3. CATCH ON TO THE PUMPKIN TREND

Not only are pumpkins all over the patches these days, but every food blogger and crafting Pinterest lover has been sharing amazing ideas with pumpkins. I'm getting in on the action on Monday with a something special I have planned with Miss Gina, and I hope you'll tune in.

In the meantime, we have to make this delectable and savory Pumpkin Fettucine. Camille (via contributor Jess Simpson) brings another great dish straight to our kitchens with this combination of pumpkin puree and sage. Best part: very few ingredients and super simple instructions (and did you see that intro photo? yummmm).

I have a lot of crafting and tailgating ahead of me for the weekend, friends! I must be off. See you here on Monday to show off some great DIY projects, many of which involve amazing free prints for you!!

XOXO, MJ

Make It Monday: Enjoy!

Hi friends! Happy Thanksgiving to all my Canadian friends and a good Columbus day to my American buddies. Make It Monday is taking a holiday today because frankly I had a fun-filled fall weekend that offered no time for my project in the wings.Hope to show it to you soon!

One week from today I'll be posting some beautiful DIY projects. Won't you join us in the fun?? We love new friends.

See you back here tomorrow for something simple and so good you'll want to pin it...to your forehead.

XOXO, MJ

A tri- to try

Happy, happy Friday! The colors around here, my friends! Oh, they captivate me. We're headed to Michigan to pick some apples this weekend, and my oldest is going to a friend's house for her first sleepover. Nothing fancy, just down home fall fun!!

I have a varied tri- for you to try this weekend! But before we break that down, let's go Do Something Nice (because today is the official holiday to celebrate such gestures). Saturday pull out your best hats and get all kinds of silly and celebrate Mad Hatter's Day. And maybe leave it on for Sunday, too, because that one's Bald and Free Day.


1. PUT TOGETHER TIMELESS HALLOWEEN DECOR

So many scary, fantastical Halloween crafts and treats are around the interwebs! My eye was caught by a more classic approach to the festivity. Landee See, Landee Do had a great idea to put large black and white photos of her children from previous Halloweens and pair them with orange and white stripes and some other objects of the season. The result is really personal, interesting, and perfectly attuned to the trick-or-treat celebrations.

2. STARE AT THESE CREATIONS

You know that I love to post projects and possible items for your to do lists in a Tri to Try. This one is just joy for your eyes. I came across these fabulous pieces of art that combine paper, whimsy, typography, quilling, and color. Way to go Erin Cansen.

3. FEEL YOUR PLACE IN THE WORLD

This one is for the parents reading (or those of you who will be or know people who are parents). And it's a little bit of the passive and a whole lot of the active. Brene Brown, who I've been reading lately, has all sorts of inspiration surrounding vulnerability and daring, two very intriguing topics for me.

She shared portions of the chapter on parenting taken from her book Daring Greatly over at Huffington Post, and I was drawn in to her Wholehearted Parenting Manifesto.

Let me share with you some of the waterfall of goodness, parent to child:

 I want you to engage with the world from a place of worthiness. You will learn that you are worthy of love, belonging, and joy every time you see me practice self-compassion and embrace my own imperfections.

We will practice courage in our family by showing up, letting ourselves be seen, and honoring vulnerability. We will share our stories of struggle and strength. There will always be room in our home for both.

We will teach you compassion by practicing compassion with ourselves first; then with each other. We will set and respect boundaries; we will honor hard work, hope, and perseverance. Rest and play will be family values, as well as family practices.


I will not teach or love or show you anything perfectly, but I will let you see me, and I will always hold sacred the gift of seeing you. Truly, deeply, seeing you.


A special thank you to all of your lovely people who keep coming back to Pars Caeli and in particular those of you who click over between 7-8 am (the most popular click time) to start your day off with a little piece of Heaven. Cheers to a bright weekend!

XOXO, MJ


Make It Monday: The Giveaway Make It

Happy Monday! And thanks for coming over. It's so good to have you here!!

I'm excited to show you a little something I've been working on. Back in early September I hosted a giveaway where I offered the first three commenters something lovely and homemade just for them. When I posted the giveaway, I wasn't exactly sure what that handmade goodness would be...

So I thought about my three winners: Hana, Louise, and Courtney. All three of these ladies are creative, talented, savvy women. They were each going through transitions with their on-line lives. I know that these sorts of changes can be stressful, annoying, and can sometimes make you question if it's all worth it.

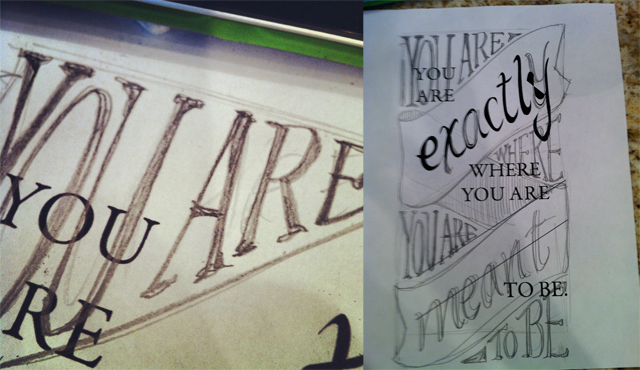
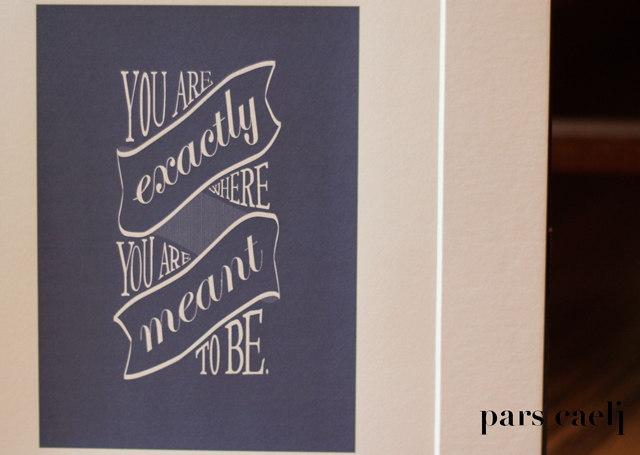
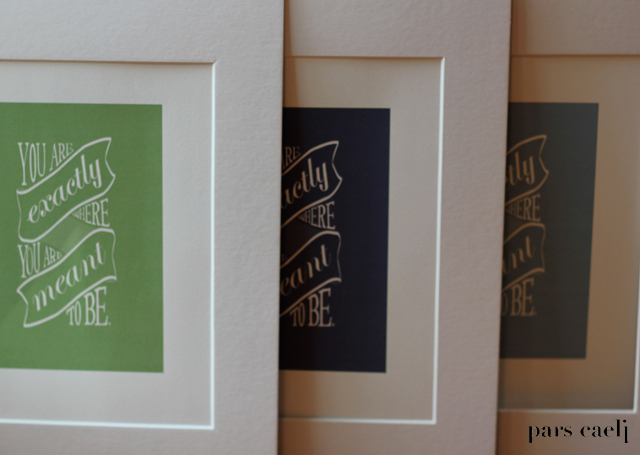
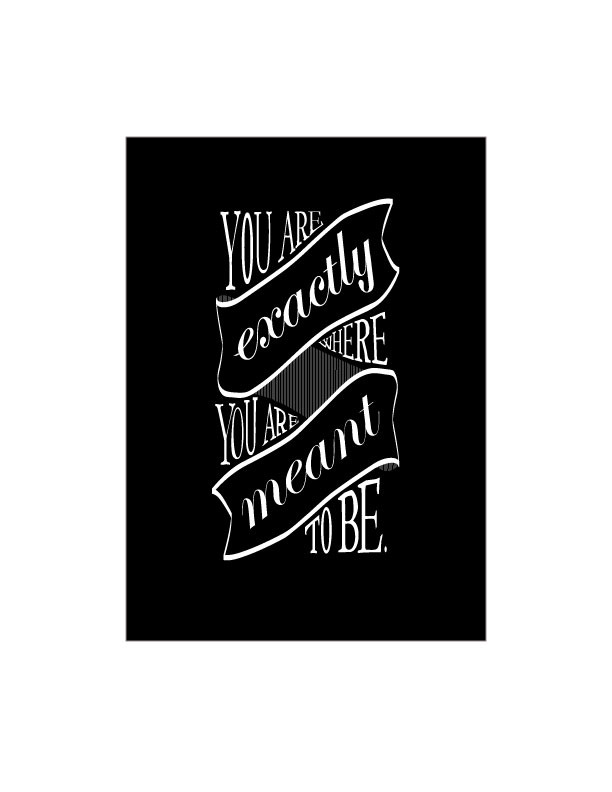
Enter a little bit of printed reassurance. You are exactly where you are meant to be.

Certainly, I thought about the rest of our lives and how we can find ourselves somewhere (physically or mentally) where we never thought we'd be...the sometimes unexpected, notably unpleasant, tough places we land. The older I get, the more I realize how significant these places of challenge are and how much they have to teach us if we can hold on, breathe deeply, and trust.

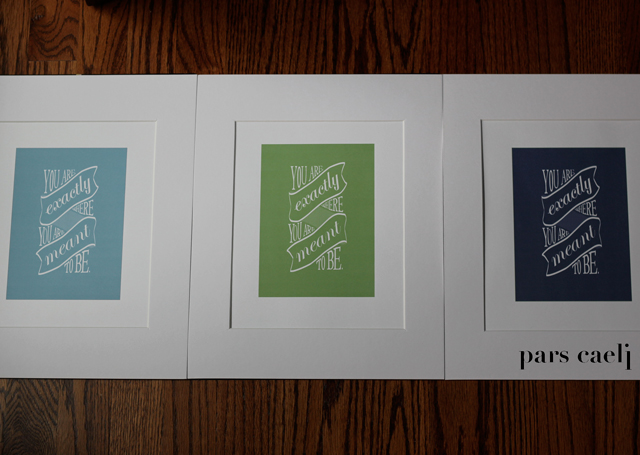
I loved sketching these and thinking about their future homes in New Zealand, California, and Florida.


I asked the ladies what colors might work in their homes, and I received a green and two blues. Beautiful Louise even sent me a photo of her (gorgeous) living room.

The task of converting these sketches to Illustrator files was a time-consuming, but I love how they turned out. I'm not sure which color I like the best?

And for you, dear readers, a black and white version for your downloading pleasure. Sometimes we all need a little reassurance. Click on the image to download the file.


Did you create something this weekend? Any projects on the near horizon?

XOXO, MJ

And a big P.S.: 

I can only take this as God hitting me over the head (which I need)... Today is the feast of St. Thérèse of Lisieux. She's a doctor of the Church, and a woman of great insight (Gretchen Rubin quoted her often in The Happiness Project, too). A friend sent along a piece of St. Thérèse's writing this morning. Check out those first lines. I knew I got these words from somewhere...

May today there be peace within. May you trust God that you are exactly where you are meant to be. May you not forget the infinite possibilities that are born of faith. May you use those gifts that you have received, and pass on the love that has been given to you. May you be content knowing you are a child of God.

Let this presence settle into your bones, and allow your soul the freedom to sing, dance, praise and love. It is there for each and every one of us.


I made these prints two weeks ago with no remembrance of St. Thérèse's writing. Hmm, I think I have a fresh Divine bump on my head.

And so I'm trusting that God has put me right where I'm meant to be, even when I kick and scream. Thanks for being here with me. :)

A tri- to try

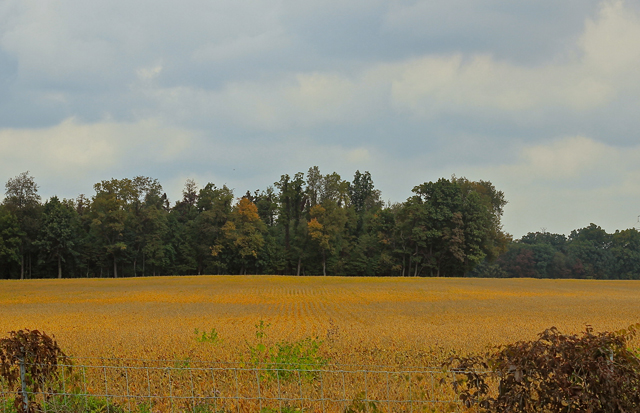
Wonder where I live? Right here in the midst of changing corn and soybean fields. And come this time of year they produce the most amazing shade of yellow orange brown (saffron?) that amplifies sunlight from the ground up. It's heavenly.

Happy Friday to you. Are we ready to kick back this weekend?? We're beginning the 3-year old celebrations tomorrow with a visit from the grandparents. My son's birthday is next Thursday, but just like his sisters, he'll likely have at least three (small family) parties along the way. Time to bake some cakes!

In addition to the gratitude I feel for the most amazing son in the world, let us also celebrate Native American Day today. Tomorrow look for wisdom and humor around you as you ring in Confucius Day, honoring the great philosopher. Sunday marks the end of September and National Mulled Cider Day so grab a mug and snuggle up cozy next to those you love!

Here's this week's Tri- to Try. Don't forget that I'd love you to be a part of the DIY date for October, which I'm hosting, and craft something with typography!! If you'd like to post the invite on your blog, please feel welcome to steal the poster jpg that I created for the date!!


1. HANG THE LEAF BUNTING THAT YOU'VE CREATED:

Have you ever been over to the Artful Parent site? Click on over and enter into a myriad of amazing projects for children and adults alike. I've been a fan of Jean's for a while, and I'm excited to show you some of the loveliness she's put together for fall. If you live in a part of the world that has leaves changing colors right now, go out and grab an armful and follow along!

2. MEMORIZE YOUR PERIODIC TABLE:

Nerd alert here. I loved learning the periodic table. My dad is a chemical engineer, and I was fascinated with his knowledge of these boxes and their abbreviated meanings. I suppose the graphic designer in me liked the sense of geometry, order, and balance, too. Gabrielle over at Design Mom posted this nerd-rrific print of a Periodic Table for kids. Check it out over on Etsy...each column means something different for adults and children, and it's really a great teaching tool and a beautiful reminder. Perfect new baby gift for the geeks that you love. :)

3. PRACTICE YOUR CUTTING SKILLS AND MAKE SOME WEBS:

Kelly over at Studio DIY is working up all sorts of Halloween and holiday decor and party ideas. I saw her step-by-step tut on how to make paper spider webs, and I knew we had to try this one at home! It's like all the fun of paper snowflakes without the chill of the impending winter. She posted the instructions over at Amy's blog This HeArt of Mine. Grab your scissors and head over!!

That's all from here, friends! Wishing you a bright weekend.

XOXO, MJ

Happy Kiddos: Big Boy Space

This is not a sponsored post. This is a story of Twitter.

Well, really, this is a story of fabulous design that just so happened because of the ingenious means of communication known as Twitter (did you ever read about Paige's amazing job she secured through Twitter?). I love having the ability to talk right to my favorite people and brands in a simple, concise manner.

I've been following the witty posts of the Land of Nod for a while. Their blog Honest to Nod is always filled with cute ideas and beautiful designs that make me want to relive my childhood again and again. I am smitten with Land of Nod's combination of well crafted furnishings with quirky, life-loving designs.

So when @thelandofnod asked if anyone had a design dilemma, I tweeted right back. And EEK! Danielle Kurtz (hello, Creative Director) asked me to send her an email to hear more.

And what followed were numerous exchanges back and forth where I had the opportunity to tell Danielle all about my dreams for my son's new big boy room and where she authentically wanted to know more about my style, my son's personality, and see the space for future planning purposes.

I'm so over-the-top excited with what she put together. You can check out the entire project on the Land of Nod's Pinterest page under L's Big Boy Room. Beautiful Danielle even linked up DIY projects that would fit well with my goals for the space (I hope to share these with you in the weeks ahead).

Here's my initial explanation of our needs:

We decided to purchase the Simple Twin bed and wide dresser for my son. He's turning 3 in a month, and we wanted some Land of Nod pieces to get him started in a new big boy room. He's a bundle of energy. He loves cars & trains (right now). His favorite colors are orange and blue. We have purchased a madras plaid quilt with navy, green, and oranges in it. He loves stripes. He also wants a place where he can hang his artwork.

And here's Danielle's lovely interpretation from the Land of Nod:

And the whole thing makes me happy, from ear to ear. This is all so perfect for my son. My faves? That simple car print, that adorable orange chair, and the gummy bear nightlight...but I kinda like every single piece. And the color from Benjamin Moore, Palladian Blue has been in my sketchbook for a while now just waiting to fill one of our rooms. Yay!

Since our money tree is not blooming this season, we'll make some great selections from the inspiration board and DIY/thrift/budget store the remainder.

Have you ever had professional consultation on an interior space? Or has Twitter gifted you with something unexpected and wonderful?

Can't wait to share more!!

XO, MJ

Make It Monday: DIY Date

Happy Monday, friends! Can you believe we have just one more Monday left in September? I have something really fun to share with you all for Make it Monday!!

This is cordially for you (fellow bloggers, artsy crafty friends, skilled readers who want to give it a go):

What will you do with letters or numbers or ornaments? Keep in mind, this DIY can be electronic or printed/created as an object (have those cardboard letters at Michael's been calling your name, too?) or a framed print.

We've had some great supplies to work with these past few months! September was all about sharing the love. Check out the craft kits we created for the children of St. Jude's Research Hospital. In August we came up with some stylin' projects out of beads, and Louise, to celebrate her birthday, challenged us to give our projects to someone. Our first DIY date included washi tape and an experiment for me (that ended well).

Need some inspiration for this typography DIY? Check out these Pinterest boards:

I really hope you'll consider crafting something with us. It's all about having fun along the way. Reluctant new friends, we want you, too!!

XOXO, MJ

Rainbow Circle Garland

I'm delighted to show you a simple, quick, low budget project that you (or your kids or grandma or neighbors) can craft in minutes and enjoy for weeks to come.

Last week I joined some other great bloggers to put together baggies of crafts for the Happy Craft Cart that St. Jude's Research Hospital offers its patients.

Hoping for something festive and fun, I thought rainbows. How about a Rainbow Circle Garland?!

PC_rainbowcircles.jpg

All you need:

  • Colorful paper
  • Twine/string/yarn
  • Glue (I used rubber cement but glitter glue would make it sparkle!)
  • Circle craft punch (not necessary but very efficient)
PC_rainbowcirclesupplies.jpg

Step One: Decide how long you want your garland or strand (if you want to hang them from a door frame or above a window). Cut twine.

Step Two: Punch out circles. Each circle cluster is a triad so you'll need three times as many circles as you want to glue on.

PC_rainbowcircles2.jpg

Step Three: Pick three of your circles. Fold them in half. Glue the back halves of each circle. Press two of the circle halves together, sandwiching the twine in between them. Glue the final circle to the other halves. *To make sure you get a rainbow effect, keep switching the combination of three colors.

PC_rainbowcircles3.jpg

Step Four: Find a spot that needs some cheer. Hang over a headboard, around a curtain rod, from a door frame, or lay across a table to surround yourself in rainbows.

PC_rainbowcircles4.jpg

Garlands spread festivity, don't you think?

PC_rainbowcircles5.jpg
PC_rainbowcircles_6.jpg

What are you making this week?

XOXO, MJ

A tri- to try for fun

Hi friends. Happy Friday. :) It's been a fun blogging week, and I'm excited to share some special treats for today's Tri- to Try.

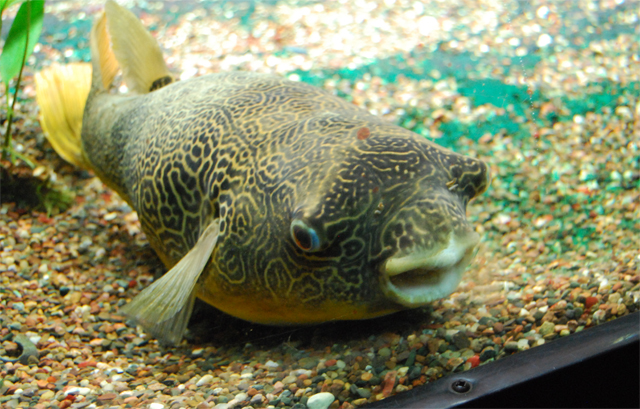
And to start it off: the best photo I've ever taken of a fish. Because.

Did you have a cream-filled donut for breakfast? Pick one up and lick the cream first. It's National Cream-filled Donut Day. Of course you might regret it on Saturday when we celebrate the anniversary Alexander Fleming's discovery of penicillin and our good health! September 16 is National Play Doh Day so why not make some playdough at home and mold to your heart's content?!

Let's talk about a Tri- to Try:


1. MAKE A CRAFT KIT:

Have you stopped over to Louise's site today to see our work? This month's DIY date was a challenge posed by Paige to get all of us bloggers crafting for a great cause. St. Jude's Research Hospital offers its very deserving patients the opportunity to create via the Happy Cart Crafts, aka: baggies filled with all the supplies to make an adorable craft and bring a smile to a young face. I posted one of our crafts on Monday, and I hope to share another with you next week!

2. PREPARE SOME PUMPKIN:

When I asked Amy if she could whip up a recipe for Starbuck's Pumpkin Scones, I knew she'd be able to do it. She's always coming up with delectable dishes that make me want to spend my entire Sunday whipping up good smells and yummy bites in the kitchen.

She posted 11 pumpkin recipes that I must try. Highlights include creamy pumpkin pasta, pumpkin butter, and (Yes! Yes! Yes!) homemade pumpkin spice lattes.

3. STYLE A GALLERY:

Creating a gallery wall is on my fall adventure list. Gabrielle Blair recently posted an amazing selection of gallery wall ideas, and you have to check them out. 22 very different walls await your viewing. My faves? Switchroom's and Bright, Bold, and Beautiful's vintage mix. I am inspired!

Wishing you a bright weekend, friends! What do you want to try?

XOXO, MJ


Something new! Make It Mondays


Well, hello, friends! How was the weekend? We were busy bees over here, and I'm excited to welcome you to a new Pars Caeli feature, Make It Mondays!!

Every Monday we'll kick off the week with a fun project for your home, your children, yourself, or something else magical. You then have the whole week and weekend to find some time to fit the fun into your schedule!

Why the new addition? Three simple reasons: 1.You beautiful readers have eaten up the DIY posts I've featured here and there on the blog. 2. I'm always looking for ways that this webhome can be more helpful to your life outside of cyberspace (there is still one out there, right?). 3. I can't pass up an opportunity for alliteration wherever I can find it. :)

So, on with the fun...

I carved out time this weekend, between football games and birthday parties, for some prep of our St. Jude DIY date with other wonderful blogger friends. You and I have until Wednesday to submit pictures to Louise. Special thanks to Paige(who is right now living it up in NYC for New York Fashion Week!!) for thinking up this crafty goodness. To sum it up, we're all making kits for the Happy Craft Cart of St. Jude's Research Hospital. These baggies will contain the supplies needed to make a simple craft and lift a child's spirit in the process.

I knew that I wanted to grab my kiddos and get them involved in the creation of these bags. I've started a  Pinterest board for anyone who wants some ideas (go, go visit!!). Introducing my 7-year old to Pinterest was a trip. She's hooked.

We were blown away by a few crafts by Minieco, and we decided to give them a go. Have you seen her photos and crafts(wo)manship? Outstanding!!

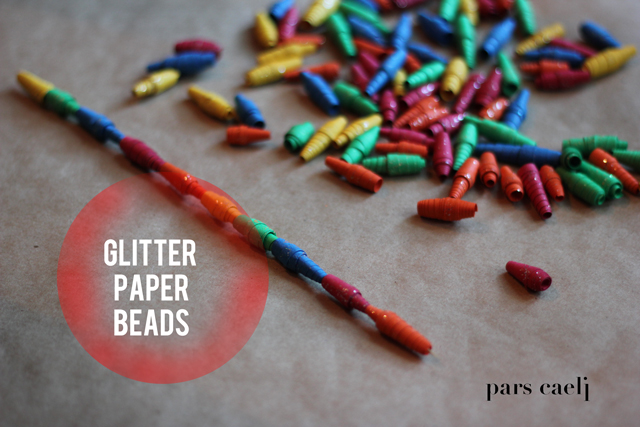
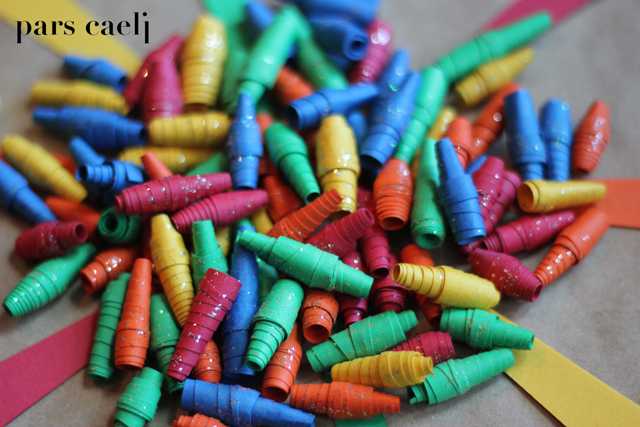
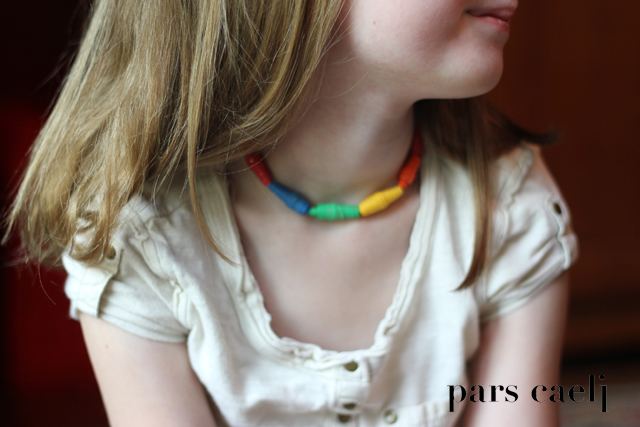
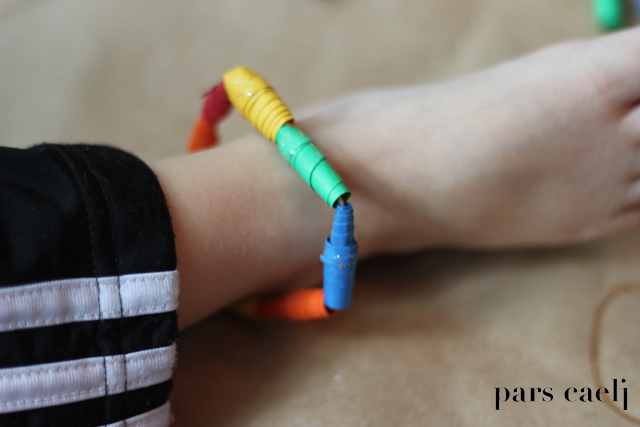
Our first batch of Happy Cart Crafts will be baggies of these glitter paper beads. Some of the kits will have the beads already made so that younger artists (under 7) will still feel confident in their results, and other kits will have the paper and glittler glue needed to make it all from scratch!

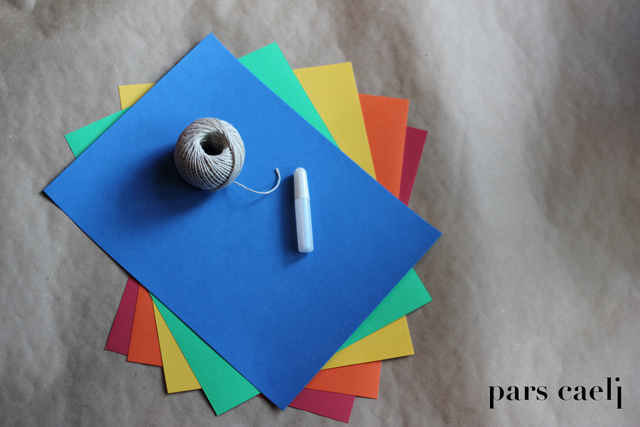
This is an incredibly budget-friendly (slightly time intensive) craft that all three of my children enjoyed. Here's what you need:

  • Paper (we chose rainbow and only used one piece of each color paper to make all the beads here)
  • Scissors or paper cutter (I bought my Xacto cutter many years ago, and it comes in handy for these sorts of projects)
  • Glitter glue (really, any glue is fine, but glitter makes everything better, right?)
  • Skewer (you could also use a pencil or anything with a small circumference to wrap the paper)
  • String or twine for necklace/bracelet/anklet creations

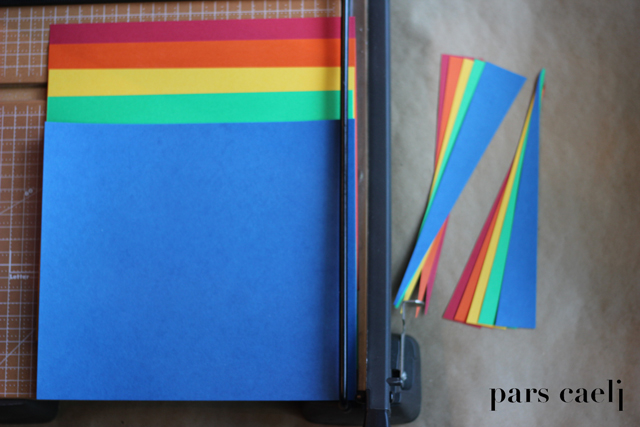
First step? Cut isoceles (ish) triangles out of your paper. Ours were about an inch at the thick end.

Next, begin with the thick end and tightly (the key!) wind the entire triangle around the skewer. We made different shapes by doing this. Some beads were exactly symmetrical, some looked more like cones or party hats, and others looked like a wobbly top.

As you get close to the end of the wrapped paper, squirt a dollop of glitter glue on the front and back of the end tail and graciously smear it all over the end and the rest of the bead. This will help secure the tight wrap and spread the glitter around the whole bead.

Once the bead is secured, carefully remove it from the skewer and let it dry for a few minutes before crafting further. We spent an evening making all our beads and the next afternoon making accessories out of them.

My 7-year old REALLY got into this project. She's a talky crafter so I had the pleasure of hearing her elaborate on how good she felt creating something she knew would make other children–children who really needed it–happy. She alone made half the beads, and she made me very proud. Again.

She's anxious to make more Happy Cart Crafts, and we'll be sharing those with you, too! Beads like these work well when made from magazines, too. Maybe you and/or your kiddos would like to give them a try?!

And because little brothers like to get in on everything, here's little L's anklet.Thanks for stopping in on Make It Monday! It's gonna be a great week, friends.

XOXO, MJ

A tri- to try with some DIY

Happy Friday! I'm ready for a productive weekend. It's our last one before school begins! We have so much to celebrate.

Raise your glasses tonight for us, will you? We're celebrating our 10-year wedding anniversary today. A special loving shout out to the man behind Pars Caeli. Without him, none of this is possible...the love, the hope, the support, and the faith that we have shared. He has diminished the ugliness and amplified the beauty of life for these last ten married years. I love you always. Always, dear.

On Saturday we celebrate Sisters Day. This date was chosen by my daughters who felt like Mommy and Daddy were getting all the attention this time of year. And, so, one day after our anniversary, we party with the sisters in the house. Grab a bag of popcorn, we're in for some braiding, crafting, and giggling.

Spend some time on Sunday dreaming of your next flight of fancy as we live it up for National Aviation Day. Where are you headed next?

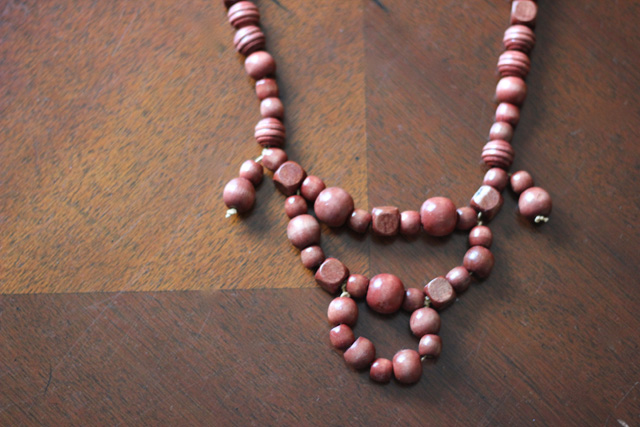
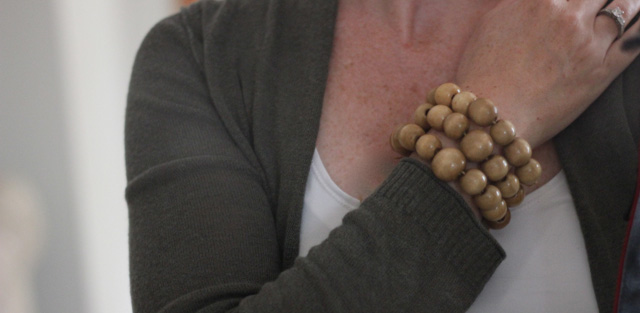
Special welcomes to those of you hopping over from Laid Off Mom's great DIY date this month. Louise challenged us with beads. If you haven't visited her site to check out all of the amazing creations, run, run, run! I got carried away with wood beads, and inspired by J Crew's bubble necklace, I made the top necklace. It's just some knots, cords, and chunky beads. I also made the bracelet (that I've also worn as a necklace) for a little neutral drama (those two things can go together, right?).


In the spirit of DIY, I have found three easy, dramatically wonderful projects for you to accomplish (start to finish) in one sitting!

1. PRINT A BAG OF GOODNESS:

Jordan over at Oh Happy Day made some charming printed brown paper bags that make me think happy thoughts for the first days of school and great goodie bags. You can do this simple process (she takes you through how to do this with your own printer) with some impactful results.

And if you're looking for great school lunch ideas, check out the creative ideas that Jen has over at Classic Play. Easy ways to make the most out of the noontime meal.

2. FOLD MAGIC PAPER SQUARES:

Jessica creates the most unbelievable paper projects. I admire each and every one of them. Many I could not do. This one, my friends, I am making. I think it'll go in the playroom. If you send me the paper, I'll make one for you, too. Imagine this in a shade of one color (a la ombre goodness). Gorgeous!! Start to finish time? 10 minutes...maybe.

Let's make one of those paper balls in the photo, too, okay?

3. ADD A TWIST TO YOUR FAVORITE PONY:

My hair is really long right now. Like middle of my back long. I wear it up 98% of the time, and I'm always looking for cute (easy) ways to style it. Joanna Goddard finds the best of most things, and hair styles are no exception. Here's a simple twisted ponytail that looks and is super simple. This pony adds a little something extra to the classic silhouette.

Have a bright weekend, friends. Will you be DIYing anything?

XOXO, MJ

PS. I'm also over at Bring Joy today. See you over at Janae's gorgeous site.

DIY Crafting with Louise

I'm so delighted to be joining in the washi tape crafting with Louise and so many of my favorite ladies in the blogosphere. Please head over to Louise's page to see all the inspirations crafted up for this date!

I love my stripes and I love my Instagrams so I married the two and created a desktop corkboard for my favorite Instagrams. More on this Friday so please check back!

DIYMJ Kocovski
DIY for Daddy's Day
PC_daddysday_3.jpg

We have birthday and Father's Day celebrations ahead, and we're excited! How are honoring the dads in your life? We keep things pretty simple for Mother's and Father's Day, and we're looking forward to celebrating my hubby with a drive-in movie and some grill time.

I feel so blessed to be married to a man who has embraced-with both arms wide open-all that is fatherhood. He pushes me to be a better mother because of the great parent that he is...supportive, challenging, cuddly, and fun all rolled into one. The kiddies and I decided to craft up something for the Best Daddy, something simple to offer him a high five for all that he does. My hubby is an amazing cook, and he can spin circles around me in the kitchen.

Our DIY is a Helping Hand towel for Dad. We used three supplies: three good quality kitchen towels (I chose a neutral shade to go with my kitchen), white fabric paint (color chosen to make the prints similar in tone to the towel), and a foam brush.

PC_daddysday_1.jpg

Simple, simple...coat your child's hand in paint. Lay it on thick. It will tickle. :) Help them spread their fingers and place their hands straight down. Hold 1-2-3, and pull straight up.

Follow the instructions on the paint for setting.  Allow 72 hours before washing, and hover over the painted surface with a hot iron to finalize.

PC_daddysday_2.jpg

We chose textured towels for their absorbency so I needed to go back into to fill fibers not covered by the initial print. The kids loved getting gooey, and they've all had plenty of experience making handprints, so it was a start to finish 15-minute craft. Yahoo!! The wrinkles that don't photograph so well will work themselves out after the first wash and our darling handprints will remain. I love peeking at them from across the room and seeing the preciousness of childhood waving back at me.

Happy Father's Day...to my hubby, to my awesome, fun-loving Dad, to my brother, to my father-in-law and to all you amazing, wonderful men who complete the great story of parenthood. We adore you.

Have a bright weekend, friends. Can't wait to show you what's in store for next week. Happy summer!

XOXO,

MJ

PS. One of my blogging goals was reaching yesterday! Gabrielle at Design Mom published my response to one of her Design Mom Asks. Design Mom was the first blog that I followed, and I've been faithful for years. So, when she opened up the chance to respond to a GREAT BIG question, I gulped down that bait. I'm embarrassed to tell you how long I spent on my answer, but then again, when you see the question, perhaps you'll agree that the topic is one we should probably all mull over. Cheers! Check it out